SUMMER SALE! Secure €370 discount on GAN until 24.08.26!
05065058
Suspension tuning is always a compromise between handling, comfort and road legality. A 30–40 mm drop with a properly matched spring-and-damper setup reduces body roll, sharpens steering response and improves high-speed stability. A coilover kit gives you precise ride height adjustment. A strut bar increases the torsional stiffness of the front end. Each step requires the right documentation — and, in most cases, a type approval or inspection sign-off.
The factory suspension is engineered for the widest possible audience: maximum comfort, tolerance for varying speeds and load conditions. That’s an intentional compromise. When engine output increases — through a tuning module or other means — the factory suspension calibration often no longer matches the new dynamic demands. The car rolls more in corners, responds sluggishly to steering inputs and wanders during quick lane changes at motorway speeds.
Proper suspension tuning addresses exactly this: it brings the chassis in line with the car’s actual power output and real-world speeds. The goal isn’t “as low as possible” — it’s “optimally set up for the task.”
There are three main options for lowering a car, and each follows its own logic.
The most common starting point. Shorter, stiffer springs are fitted to standard or uprated dampers. According to data from Bilstein, fitting stiff springs to worn factory dampers compromises both comfort and control — the damper simply can’t keep up with the sharper rebound rate. The rule is straightforward: if your dampers have covered 80,000 km or more, replace them at the same time as the springs.
Drop: typically 20–40 mm depending on the model. Entry cost is low. Most serious manufacturers (H&R, Eibach, Bilstein) supply the required type approval documentation with the kit. The downside is fixed ride height — there is no adjustment.
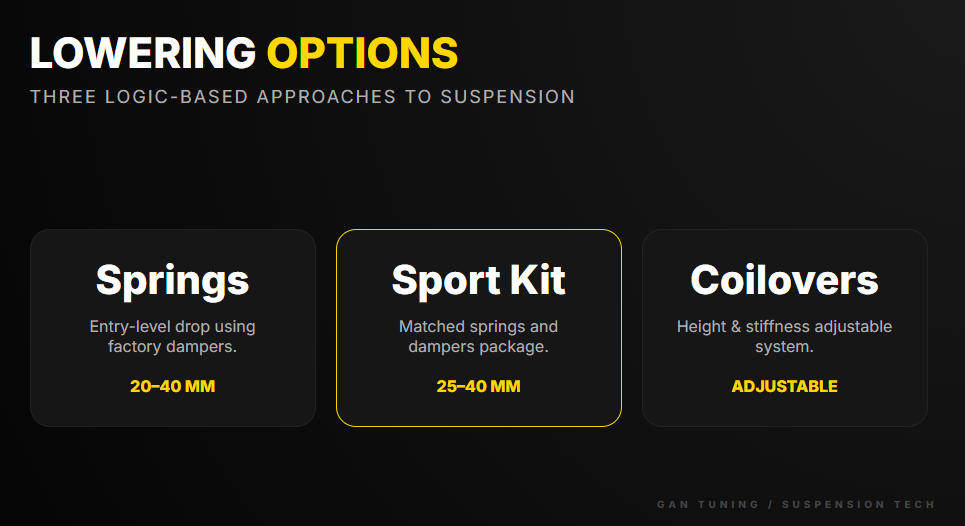
Springs and dampers from the same manufacturer, optimised for a specific drop figure. The key word is “matched”: the damper’s rebound and compression rates are calculated specifically for the stiffness and travel of those springs. The result is more predictable and consistent than mixing any spring with any damper.
This is the best option for a daily driver: 25–40 mm drop, predictable behaviour, no unpleasant surprises in everyday use.
A height-adjustable system, often with separate damper stiffness adjustment. A coilover guide will tell you this is the most flexible option on the market: you can set the ride height precisely for the situation — a little higher for winter and daily driving, lower for track days or show events.
Coilovers require careful setup within the ranges specified in the type approval documentation. After any significant adjustment, a four-wheel alignment check is mandatory. A coilover kit gives you maximum flexibility, but it also demands maximum responsibility in how you use it.
| Parameter | Lowering Springs | Sport Kit | Coilovers |
| Drop | 20–40 mm (fixed) | 20–40 mm (fixed) | 20–80 mm (adjustable) |
| Height adjustment | No | No | Yes |
| Stiffness adjustment | No | No | Often yes |
| Compatibility | With standard/sport dampers | Paired only | Complete set |
| Type approval | Often included | Often included | Required, model-specific |
| Price | Low–medium | Medium | Medium–high |
| Ideal for | Daily driver | Daily + sport | Track, show, fine-tuning |
The suspension is the logical next step after engine tuning. GÄN Tuning Büro has specialised in power upgrades for turbocharged and naturally aspirated engines since 2015 — over 30,000 vehicles across 8 countries. Want to know what’s possible for your car’s dynamics? → Find the right GÄN tuning module for your car
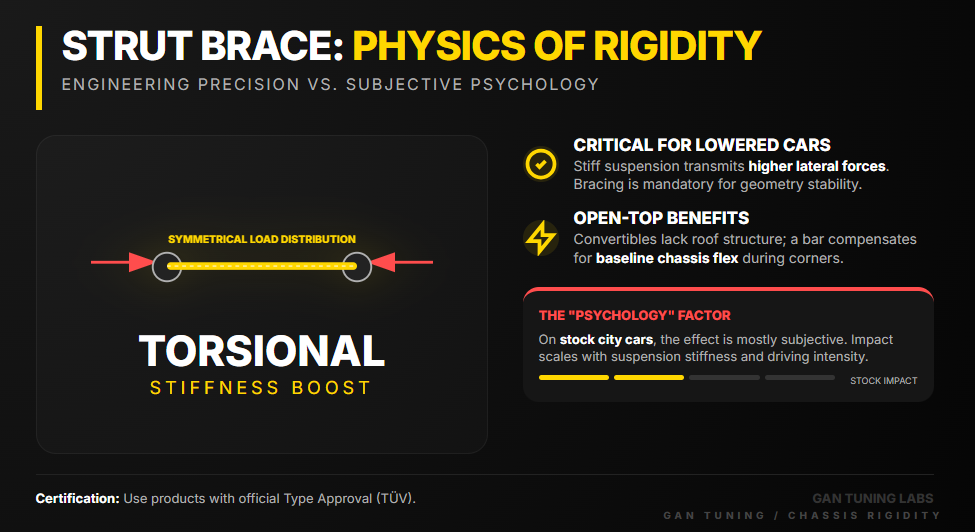
A strut bar is a rigid cross-brace connecting the two front strut towers. The physics is direct: as the car corners, large lateral forces are transmitted through the suspension struts. Without additional bracing, the strut towers can flex slightly relative to each other — the suspension geometry shifts, steering precision drops and feedback becomes vague.
The strut bar distributes these loads symmetrically between the left and right towers, increasing the torsional stiffness of the front end of the body. The practical result: more precise steering response, more stable suspension geometry under hard use and less long-term wear on the strut top mounts.
The effect is most noticeable in three scenarios. First, on a lowered and stiffened car: a harder suspension transmits loads to the body more intensely, so the additional rigidity from the brace is felt more clearly. Second, on a convertible or open-top body: the baseline torsional stiffness is inherently lower than on a coupé or hatchback with a full roof structure. Third, on a powerful car in fast corners: when lateral forces are systematically high — on a track day, at motorway on-ramps — the strut bar helps keep behaviour predictable.
On a standard, unmodified car with factory suspension used in urban traffic and relaxed motorway driving — the difference will most likely remain subjective. The automotive engineering community is honest about this: the effect of a strut bar scales with suspension stiffness and the intensity of use. On a stock car it’s questionable. On a lowered, stiffened and tuned car it becomes a different conversation.
From a type approval perspective, a strut bar is a structural modification. The safe approach is to use products that come with the appropriate type approval documentation. Most quality manufacturers (Eibach, H&R, Strutbrace) supply their braces with the necessary paperwork.
Any suspension modification falls under safety-relevant components. This means strict documentation requirements in every European market.
General type approval (equivalent to ABE) — a blanket approval for a specific component type. Buy it, fit it, carry the document in the car. No additional inspection required.
Component expert report (Teilegutachten equivalent) — a technical assessment tied to a specific vehicle type and model. After installation, a visit to an approved inspection centre is required, along with an official entry in the vehicle registration documents. Without this step, the car’s operating permit is effectively voided — which has direct consequences for insurance cover in the event of an accident.
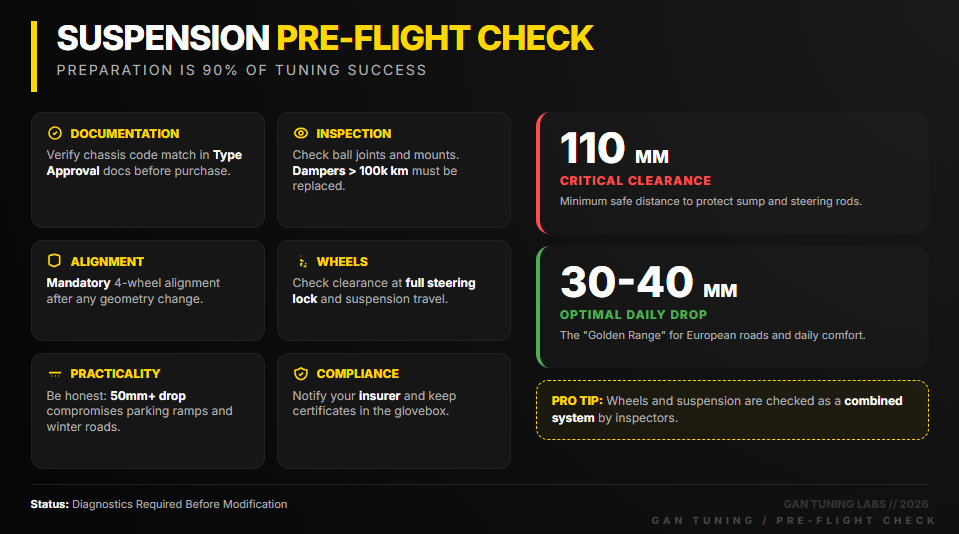
There is no single European standard that specifies a minimum clearance figure in millimetres. However, inspection bodies across Europe apply a common practical test: the vehicle must be able to pass over a fixed obstacle (typically 800 mm wide, 110 mm high) without hard structural components making contact. In practice, this means a minimum of approximately 110 mm of clearance for metal components.
Most markets also have specific rules on the minimum height of front and rear number plates above ground level, as well as headlamp height requirements. These are worth verifying for your country before a deep drop.
Illegal suspension work without proper documentation can be treated by your insurer as an undeclared increase in risk. In the event of a claim, the insurer may reduce the payout or seek recovery. This is a concrete, financial argument for doing everything with the correct paperwork — not a philosophical one.
Suspension and engine work best as a system. The GÄN GT tuning module increases turbocharged engine power by up to 25%, torque by up to 25% and reduces fuel consumption by up to 15%. IP67-rated housing, 5 operating modes, smartphone control. Removable in 60 seconds without a trace in the ECU — manufacturer warranty stays intact. Engine warranty up to €5,000 for 2 years — the only one in the segment with real financial coverage. →Learn more about GÄN GT at gantuning.com
Most problems with suspension tuning don’t come from the components themselves — they come from poor preparation and incompatible combinations. Fitting multiple systems at once (suspension plus wheels plus brakes) also creates additional complexity, since inspection bodies typically assess each combination separately.
Verify documentation before purchasing. Confirm that the springs, coilover kit or strut bar carry the correct type approval for your specific vehicle. The chassis code in the documentation must match your car.
Check the condition of existing components. There is no point fitting stiff lowering springs to dampers with 100,000+ km on them. Inspect first: ball joints, bushings, top mounts. Issues that surface after a spring change were almost always there before — the new setup just makes them obvious.
Assess remaining suspension travel and ground clearance. After fitting, confirm there is sufficient travel before the bump stops, and that hard components (sump, exhaust, steering rods) do not approach the ground dangerously. The 110 mm obstacle test is not just for inspectors — it protects your car on steep car park ramps.
Four-wheel alignment is non-negotiable. After any significant suspension change, have the geometry set on a professional alignment rig. With extreme drops, the standard adjustment range may not be sufficient — adjustable control arms or additional correction components may be needed to return the geometry to specification.
Wheels and suspension together require separate attention. If you are changing both the suspension and the wheels at the same time, inspection bodies will check clearances to arches, wheel wells and brake hoses through full suspension travel and full steering lock. Wide wheels plus a lowered car is not an additive calculation — it is a standalone engineering task that requires its own documentation.
Inform your insurer and keep documents in the car. Notify your insurer of significant suspension changes. Carry the type approval documents and inspection certificate in the glovebox — it resolves questions immediately at roadside checks and periodic inspections.
Be honest about everyday use. Lowering a car by 50 mm or more is a genuine compromise. Multi-storey car parks with steep entries, winter roads, poor surface quality — everything becomes harder. The sensible range for a daily driver in European conditions is 30–40 mm.
Myth: “Lower always means better handling”
The facts: up to a point, lowering a car does reduce the centre of gravity and cut body roll. But beyond approximately 50 mm — without parallel geometry correction, stiffer anti-roll bars and a ground clearance check — the effect reverses: limited suspension travel, harsh impacts over bumps, incorrect camber angles and accelerated tyre wear. Experienced suspension specialists consistently cite 30–40 mm as the sensible range for road use. Below that, you are making a trade in favour of appearance.
Myth: “Stiff springs plus stock dampers equals a sport suspension”
The facts: the stock damper is calibrated for the stock spring rate. A stiffer spring produces a sharper rebound that the original damper cannot control. The result is poor comfort and poor control at the same time. A matched kit solves this problem — mixing unrelated components does not.
Myth: “If it passed the inspection, it’s legal”
The facts: the inspection covers the car as presented on that date. If a further modification was made after the inspection without updating the registration documents, the operating permit is still considered void. In the event of an accident, an insurer will check current compliance — not the date on the last inspection sticker.
Do I need an inspection after fitting lowering springs?
It depends on the documentation. If the springs come with a general type approval, no additional inspection is required — keep the document in the car. If only a component expert report is supplied, a visit to an approved inspection centre and an official entry in the vehicle paperwork is mandatory. Without this, the operating permit is formally invalid.
Can I fit a coilover kit myself, or do I need a workshop?
The physical installation is possible at home if you have a lift and the right tools. However, a four-wheel alignment on a professional rig is required afterwards — that cannot be done at home. Add to that the inspection visit if you only have a component expert report. In practice, most people go to a specialist workshop to handle installation, geometry and paperwork in one visit.
Will suspension tuning affect my manufacturer’s warranty?
Potentially yes, if the dealer can demonstrate a link between the suspension modification and a specific failure. Legal installation with proper type approval documentation reduces this risk — the component is officially approved. Illegal modifications without documentation are a direct risk to both dealer warranty and insurance cover.
Suspension tuning works as a system, not a collection of isolated parts. The correct sequence is: engine first, then brakes and chassis, then wheels. Lowering a car for the sake of lowering it is about photographs. Lowering a car for real-world dynamics — with the right documentation, proper geometry and a matched setup — is about driving.
The sensible range for everyday European roads is 30–40 mm with a matched kit. Proper type approval documentation is mandatory, as is a four-wheel alignment after installation. A strut bar makes sense where body loads are genuinely high.
In short: good suspension tuning starts with engineering — not with centimetres to the tarmac.
Want to upgrade your car properly — engine and chassis in the right order? GÄN Tuning Büro offers a 50-day test drive of the tuning module with a full money-back guarantee — the longest trial period in the segment. Engine warranty up to €5,000 for 2 years. Developed and manufactured in Germany since 2015. →Test GÄN risk-free for 50 days
Tint percentage is the single most misunderstood term in car window tinting. Across Europe, regulations permit significant darkening on rear windows — typically down to VLT 5 % — while prohibiting any additional film on the windscreen and front side windows. The minimum legal VLT for front glass is 70 % in most markets. Getting this wrong risks failing your periodic technical inspection (PTI) and can void your insurance after an accident.
The confusion starts with two terms that measure opposite things.
Tint shade refers to how much light a film blocks. A film labelled “20 % tint” blocks 20 % of light and lets 80 % through.
VLT (Visible Light Transmission) is the inverse — how much light passes through. This is what PTI inspectors measure and what road traffic regulations refer to. A film with VLT 20 % is dark: it lets through only one in five photons. A film with VLT 80 % is barely visible.
In practice: when someone asks for “35 % tint”, always clarify — do they mean 35 % blockage (VLT 65 %) or 35 % transmission (VLT 35 %)? The difference is significant, especially at a technical inspection.
How different tint percentage values look in real life:
| Film VLT | Visual impression | Typical application |
| 70–80 % | Almost transparent | Only legal option for front windows |
| 50 % | Lightly tinted | Rear side windows, subtle effect |
| 35 % | Noticeably dark | Rear side windows, popular choice |
| 20 % | Dark, “privacy” effect | Rear sides and rear glass |
| 5–10 % | Near-opaque | Rear glass only, with exterior mirrors |
Window tinting laws across Europe share a consistent principle: windows that define the driver’s field of vision must be transparent, light-transmitting and non-reflective. In practice this means the windscreen and both front side windows. Additional tinting film on these is either prohibited outright or restricted to a narrow strip at the top of the windscreen.
Windscreen: additional darkening film is prohibited in virtually all European markets. A narrow sun-strip along the top edge is the only exception in some countries — local regulations apply, and the film must carry official certification.
Front side windows (ahead of the B-pillar): any darkening film is prohibited. Factory glass already sits close to the 70 % VLT threshold — additional film almost always breaches it.
Rear side windows (behind the B-pillar): tinting is permitted across Europe. Significant darkening is allowed — down to VLT 5 % in many countries — provided the film carries official certification (type approval, E-mark with test number, or national equivalent).
Rear glass: tinting to near-blackout levels is permitted in most European markets, provided two exterior mirrors are fitted and the film holds the relevant certification.
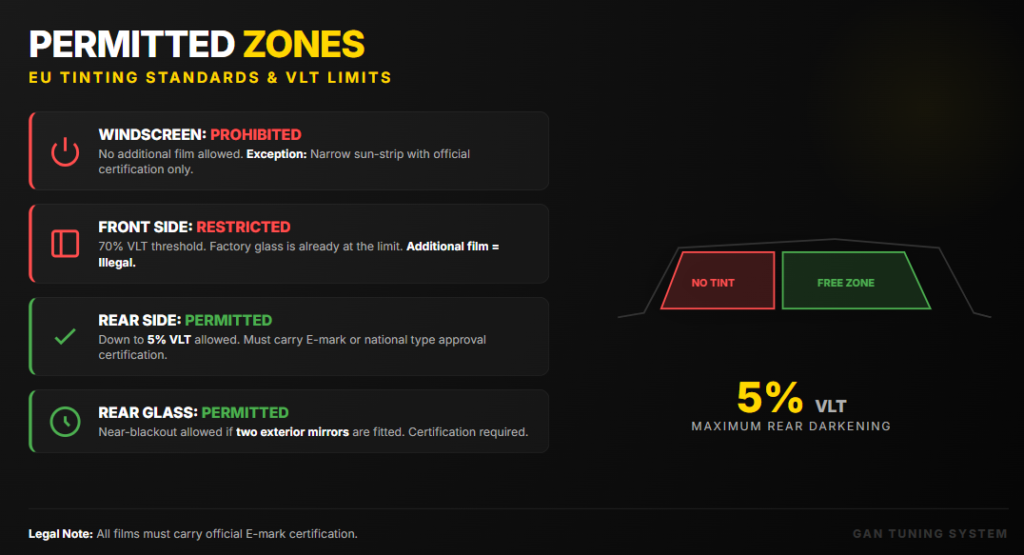
Official certification — a national type approval, ABG (Allgemeine Bauartgenehmigung) in German-speaking markets, or equivalent — is the legal foundation for any rear-window tinting. Without it, even film on legally permitted windows may be flagged at PTI.According to legal tinting requirement data, documentation must be kept in the vehicle at all times.
Quality films come with certification marking. Cheap, unbranded films without documentation are a direct path to PTI failure.
Based on data from bussgeldkatalog.org and wh-fahrzeugstyling.de:
The worst outcome is loss of roadworthiness approval — meaning the insurer may refuse to pay out after an accident, and the car is taken off the road until the violation is fixed.
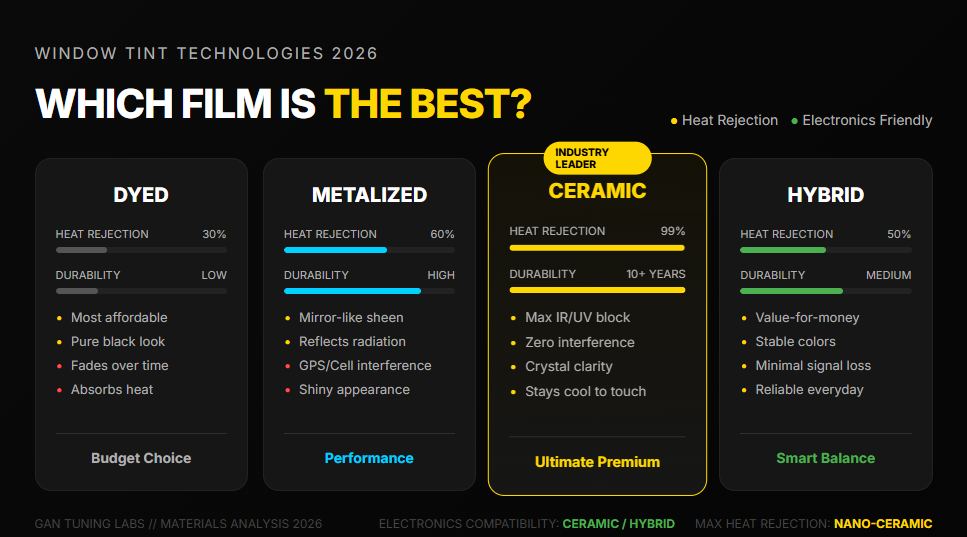
Four technologies dominate the car window tint market in 2026. The choice is a question of priorities: price, heat rejection, appearance, or electronics compatibility.
The most affordable option. A dye layer absorbs light and reduces brightness. Glare reduction — good. Heat rejection — moderate, since the film absorbs heat rather than reflecting it. Dyes fade over time, especially under direct sun. Bubbling and peeling are more common than with other types.
Suitable for a basic darkening effect on a tight budget. Not the best choice for premium interiors or regular long-distance driving.
A metallic layer reflects solar radiation rather than absorbing it — delivering stronger heat rejection than dyed films. Characteristic look: a mirror-like sheen on the outside. Key drawback: the metallic layer weakens GPS, Bluetooth, keyless entry and toll system signals. Worth weighing up carefully on modern vehicles with extensive telematics.
The top of the car window tint market. A nano-ceramic layer blocks up to 99 % of UV radiation and reflects a substantial share of infrared radiation — heat — while keeping a relatively light visual tint. A ceramic film at VLT 50 % delivers better heat rejection than a metalized film at VLT 20 %.According to ceramic film manufacturer data, quality solutions block up to 70 % of solar heat load. No electronics interference. Service life — 10+ years with professional installation.
For cars that have had engine tuning and regularly sit in traffic or cover long distances, ceramic is the most rational choice: cabin comfort improves and electronics work without disruption.
A combination of dyed and metalized layers — better heat rejection than purely dyed films, less interference with electronics than fully metalized ones.According to specialist sources on film types, hybrid films hold a consistent value-for-money position for most everyday vehicles. A sound choice for anyone who doesn’t want to pay for ceramic but values reliability.
So what is the best window tint? For long-distance driving and UV protection: nano-ceramic. For a tight budget with acceptable performance: hybrid. For pure appearance with no electronics concerns: metalized. Dyed film only makes sense as a short-term, low-cost solution.
Window tinting is one step in a broader vehicle upgrade. GÄN Tuning Büro has been working on performance tuning since 2015, optimising over 30,000 vehicles across 8 countries. Want to find out what else can be improved on your car? →Find your GÄN tuning module
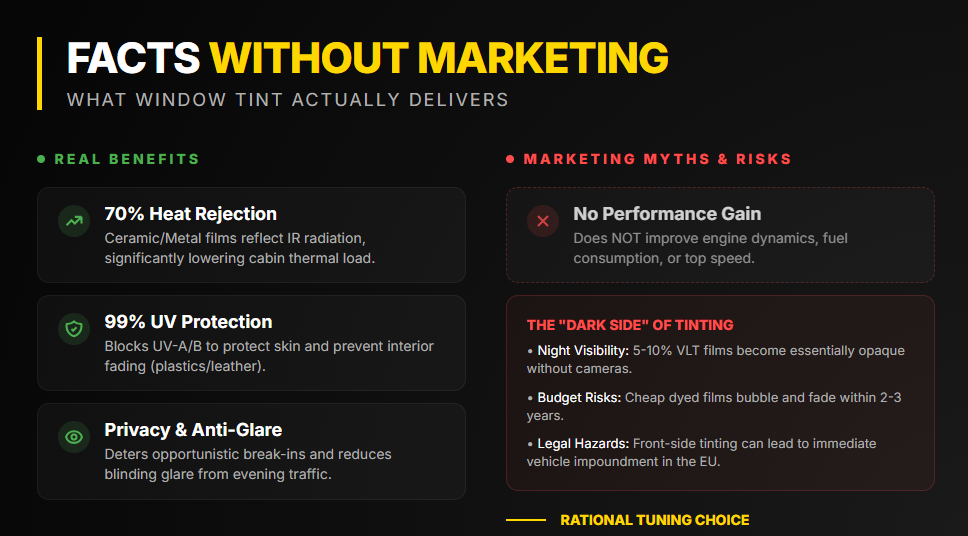
Tinting is about comfort and protection — not performance or dynamics.
Heat rejection. Quality ceramic and metalized films reduce cabin thermal load by up to 70 % by reflecting infrared radiation. In a dark interior with leather seats on long highway runs, this is clearly noticeable.
UV protection. Quality films filter up to 99 % of UV-A and UV-B radiation — protecting skin and preventing fading of dashboard, upholstery and plastics.
Privacy. Tinted rear windows make the boot contents significantly harder to see from outside — a practical deterrent against opportunistic break-ins.
Glare reduction. Against oncoming headlights, especially in the evening and during lane changes — a noticeable effect on long distances.
What tinting does not deliver: no improvement in dynamics, fuel consumption or engine performance. Worth knowing before paying for a package with no real benefit.
Downsides exist too. Darker films on rear windows reduce rearward visibility during manoeuvres — especially at night. Films at VLT 5–10 % are essentially opaque in reverse without a camera. Cheap dyed films bubble, fade and look worse after 2–3 years than no tinting at all.
If the car has already had engine tuning, tinting the rear windows is the logical next step — more power means more motorway time, and cabin thermal comfort becomes increasingly worthwhile. The GÄN GT module for turbocharged engines increases power by up to 25 %, torque by up to 25 %, and reduces fuel consumption by up to 15 %. IP67 housing, 5 modes, smartphone control. Removable in 60 seconds with no trace in the ECU — manufacturer warranty preserved. →Explore GÄN GT
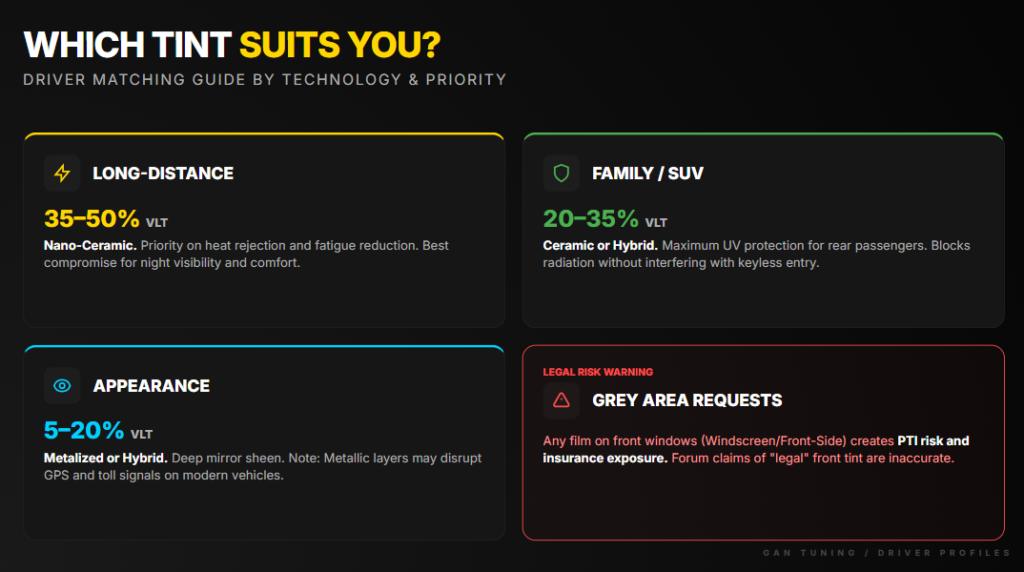
Priority: heat rejection and fatigue reduction. Ceramic film at VLT 35–50 % on rear side windows. Minimal compromise on night visibility, clear improvement in cabin comfort on long runs. Metalized films — use with caution if GPS and keyless entry are heavily used.
Focus: UV protection for rear passengers and children, reduced heat on rear seats. Darker ceramic or hybrid at VLT 20–35 % for the rear. Important: the same darkening level cannot legally be applied to front windows in any European market.
Metalized or hybrid films in a dark shade on the rear glass. Purposeful look, within the rules. A clear heads-up about the metallic layer’s effect on GPS, toll systems and keyless entry is worth giving before installation.
Online forums regularly surface supposedly “legal” ways to tint front windows. Road traffic attorneys across Europe interpret the relevant regulations consistently: any additional darkening film on the windscreen or front side windows creates PTI risk and insurance exposure — regardless of how many forum users claim to have been driving that way for years without incident.
Myth: “Darker tint percentage always means better heat protection”
Reality: Heat rejection is determined by a film’s ability to reflect infrared radiation — not by how dark it looks. A quality ceramic film at VLT 50 % outperforms a cheap dyed film at VLT 20 % on heat rejection. Dark and effective are not synonyms.
Myth: “Factory privacy glass is the same as added tinting film”
Reality: Factory dark glass is tinted in the mass of the glass itself and is certified by the manufacturer — already recorded in the vehicle documentation. Applying additional film on top of it on front windows breaches the legal VLT threshold.
Myth: “Professional installation automatically makes it legal”
Reality: No. Even professionally installed film on front windows remains non-compliant. Legality is determined by where the film is applied and whether it carries certification — not by the quality of the installation work.
Q: Does a car need a PTI inspection after tinting?
A: When only rear side windows and rear glass are tinted with certified film, no separate PTI appointment is required in most European markets — carrying the documentation is sufficient. If film was installed without certification or on prohibited windows, a remediation order follows. At the next scheduled PTI, the inspector checks compliance with local regulations.
Q: Is self-installation legal?
A: DIY installation is not prohibited. The film must still carry appropriate certification and be applied only to permitted windows. Main practical risks: uneven application, bubbling, VLT going off-spec due to layering, and complications at inspection.
Q: Does window tinting affect car insurance?
A: Only when the tinting breaks the rules. Non-compliant film — prohibited windows or missing certification — gives the insurer grounds to reduce or refuse a payout after an accident, citing undeclared modification of the vehicle’s technical condition. Legal tinting on permitted windows with correct certification does not affect insurance.
Six steps that eliminate all the risk:
In short: the right car window tint with the right tint percentage is a practical, legal upgrade — done on permitted windows, with certified film, by someone who knows the regulations.
Want to upgrade your car systematically — not just the looks, but the performance too? GÄN Tuning Büro offers a tuning module with engine warranty up to €5,000 for 2 years — the only financially backed coverage in the industry. 50-day test drive with a full money-back guarantee. Engineered and manufactured in Germany since 2015. →Order your GÄN test drive — 50 days, risk-free
An aerodynamic body kit starts delivering measurable technical effect at around 100–120 km/h. At motorway speeds, a properly engineered kit improves axle downforce, lane stability, and — in purpose-designed, CFD-calculated cases — reduces fuel consumption by up to ~5%. Most generic “wide-body” kits, however, increase drag and fuel consumption because they add frontal area without reducing turbulence.
A front splitter, side skirts, and a rear diffusor all interact with the airflow around the car’s body. The goal is to reduce axle lift, lower aerodynamic drag, or manage pressure beneath the floor. But this only works under specific conditions.
According todata from Bussgeldkatalog, a noticeable gain in downforce and stability begins at around 100 km/h. Below that threshold, the difference between “with a body kit” and “without” is barely perceptible to the driver. At sustained motorway speeds of 160–200+ km/h, the picture changes: front axle lift decreases, directional stability improves, and steering response becomes more precise.
Three conditions under which body kit benefits genuinely work:
On carefully engineered kits — notably Tesla aero kits and specialised eco-bodykits —a fuel and range improvement of up to ~5% has been documented through reduced drag. That is the exception, not the rule — and it requires a wind tunnel, not just wider sills.
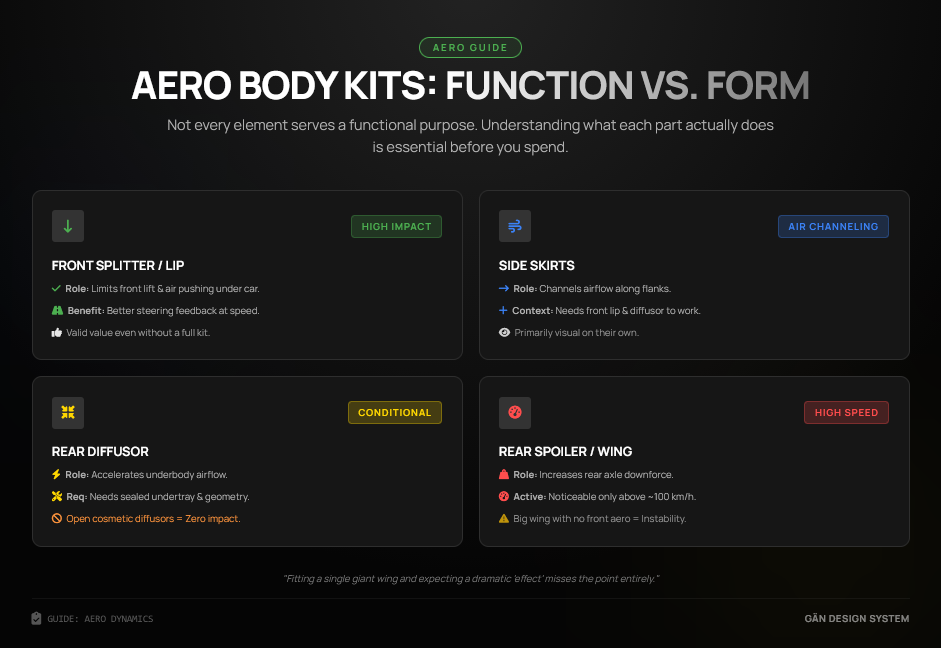
Not every element of an aero body kit serves a functional purpose. Understanding what each part actually does is essential before you spend.
Front splitter / front lip — reduces the air mass pushing under the car and limits front axle lift. Delivers a real benefit at motorway speeds: better lane stability, more responsive steering feedback. One of the few elements where the value-for-money holds up even without a complete kit.
Side skirts — help channel airflow along the car’s flanks. The effect is moderate and is most noticeable in combination with a front lip and diffusor. On their own, they’re primarily visual.
Diffusor — accelerates airflow under the car and draws air rearward. Only effective with an at least partially sealed undertray and correct geometry. A cosmetic diffusor with an open underfloor has close to zero aerodynamic impact.
Rear spoiler / wing — increases rear axle downforce, improves stability through fast corners and under braking. Standard aftermarket spoilers produce a noticeable effect only above ~100 km/h. A large wing without balancing the front end increases both drag and instability.
Every component in a body kit for car solves a specific aerodynamic problem — and only when there’s sufficient speed, the right body geometry, and the remaining elements of the kit. Fitting a single wing and expecting a dramatic “effect” misses the point entirely.
If you’ve already done engine tuning and are now asking “how do I sharpen the handling to match?” — that’s the logical next step. GÄN Tuning Büro has been tuning cars since 2015 and has optimised over 30,000 vehicles across 8 countries. Want to know whether engine performance tuning is right for your car before committing to a body kit? →Find your GÄN module
This section matters wherever you drive in Europe. Any external modification beyond factory specification can technically affect your vehicle’s roadworthiness approval — until the changes are inspected and, in many countries, officially registered in your vehicle documents.
Most European countries operate a periodic technical inspection (PTI) — equivalent to the German TÜV, UK MOT, French Contrôle Technique, Italian Revisione, Spanish ITV, and so on. Modifications that haven’t been approved through the relevant national process can result in a failed inspection, insurance complications after an accident, or fines.
Three broad categories of legal status for aftermarket parts:
Type-approved parts — the component holds official certification for road use in the relevant market, often requiring no individual inspection. Best-case scenario: buy it, fit it, drive it.
Parts supplied with an expert assessment — the component comes with manufacturer documentation that makes the inspection process standardised and predictable. Most reputable European brands supply this as standard.
No documentation (no-name, unbranded, no marking) — failed PTI, potential insurance refusal after a collision, fines. If your car is still under manufacturer warranty, there’s a direct risk of voiding it.
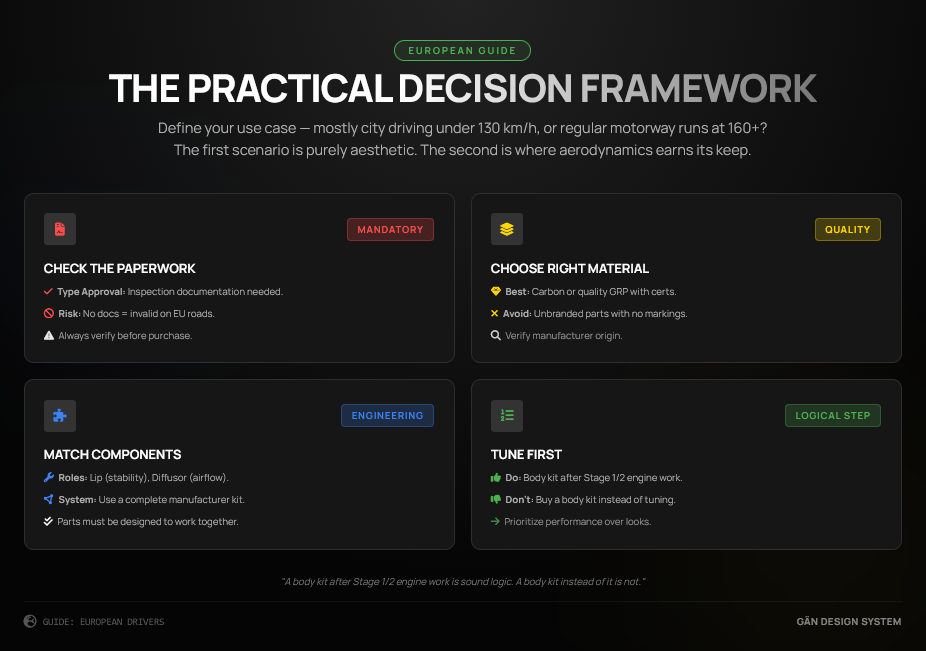
The practical takeaway for any car body kit guide for Europe: the first question when buying isn’t “how does it look?” — it’s “does it come with the right certification for my country?” Without that paperwork, the part legally doesn’t exist on the road.
Materials matter here too. Carbon and quality GRP (glass-reinforced plastic) with clean geometry and factory-spec mounting points pass technical inspections more reliably. Cheap fibreglass with uneven panel gaps cracks easily, can detach at speed, and regularly fails inspection.
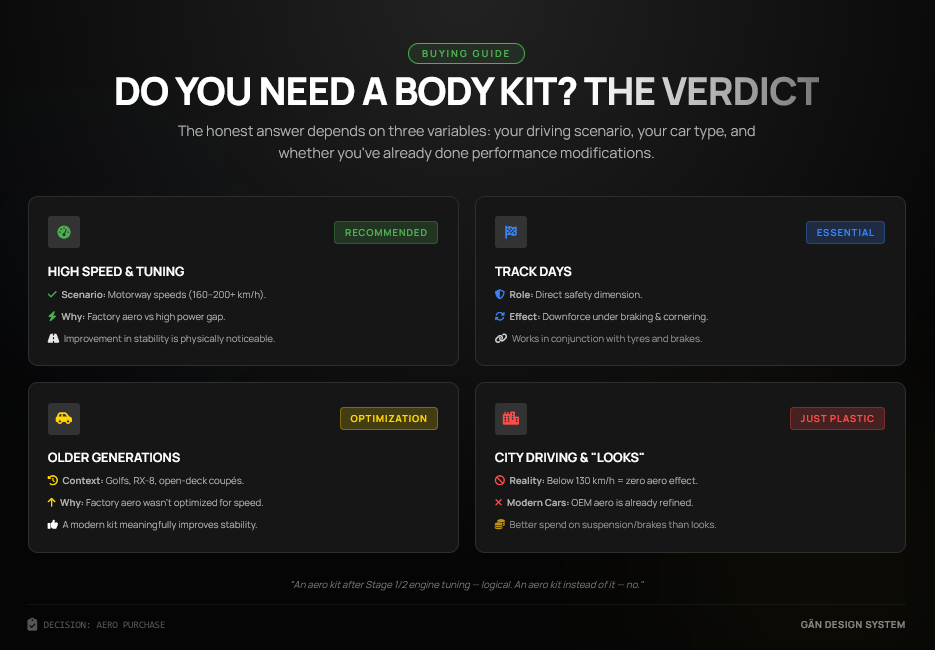
The honest answer depends on three variables: your driving scenario, your car type, and whether you’ve already done performance modifications.
First case: your car regularly covers motorway distances at 160–200+ km/h. The improvement in stability and directional control is physically noticeable. This is especially relevant after engine tuning: power has gone up, but the factory aerodynamics haven’t changed — a well-chosen body kit closes that gap.
Second case: your car sees track days. Here aerodynamics has a direct safety dimension — downforce under braking and through corners works in conjunction with tyres and brakes.
Third case: older or aerodynamically “open” body shapes — cars like the RX-8, earlier Golf generations, or open-deck coupés. A thought-through aero package can meaningfully improve stability on these platforms precisely because the factory aerodynamics were never optimised for sustained high-speed driving.
If the car is primarily a city car that rarely exceeds 130 km/h and the goal is to “look sporty” — the aerodynamic effect at that usage profile is essentially zero. On modern BMW, Audi, or Mercedes models, the factory aerodynamics are already refined; a randomly selected aftermarket body kit more often degrades the car’s characteristics than improves them.
If the budget is limited and the choice is between a body kit and engine tuning,the performance, brakes, and suspension improvements deliver far more tangible benefit on everyday roads. An aero kit after Stage 1/2 engine tuning — logical. An aero kit instead of it — no.
The combination of engine performance tuning + a street-legal aero package is a proven setup for motorway cruisers and hot hatches. The GÄN GT tuning module for turbocharged engines increases power by up to 25% and torque by up to 25%, while reducing fuel consumption by up to 15%. IP67 housing (−40°C to +60°C), smartphone control, 5 driving modes. The module is removable in 60 seconds with no trace left in the ECU — manufacturer warranty preserved. →Explore GÄN GT
| Component | Actual effect | Speed threshold | Certification needed | Best suited for |
| Front splitter / lip | Front axle downforce, stability | ~100 km/h | Type approval or inspection doc | Motorway, track |
| Side skirts | Airflow along flanks, moderate | ~120 km/h | Inspection doc | Complete kit builds |
| Diffusor | Underfloor airflow management | ~120 km/h + sealed floor | Inspection doc | Track, optimised builds |
| Rear spoiler | Rear axle downforce | ~100 km/h | Type approval or individual inspection | Motorway, track |
| Rear wing | Maximum rear downforce | ~80 km/h (track) | Individual inspection | Track only |
| Full kit | Comprehensive aerodynamic effect | ~100–120 km/h | Type approval or individual inspection | Motorway + track |
Myth: “Any spoiler reduces fuel consumption”
Reality: Most universal body kits increase aerodynamic drag rather than reduce it. Only purpose-engineered kits backed by CFD data deliver a genuine fuel saving — and only above 120 km/h.
Myth: “Fitting a body kit will immediately cause issues with the annual inspection”
Reality: Not if the component carries the relevant type approval or has been individually inspected and entered into the vehicle documentation. Problems arise only with undocumented parts. Reputable manufacturers supply inspection documentation precisely to make the process routine and predictable.
Myth: “A bigger wing always means more downforce, so bigger is better”
Reality: A wing without balancing the front end creates an imbalance — the rear axle is pressed down harder while the front becomes relatively lighter. Under braking and turn-in, this worsens handling rather than improving it. Wing size needs to be matched to a front splitter or lip for the geometry to work.
Q: Does a body kit need to be officially registered if it’s only fitted temporarily?
A: Yes. Your vehicle’s roadworthiness certificate covers the car in the condition it’s in when driven on a public road. “Temporary” fitment doesn’t exempt you from national vehicle modification regulations. In the event of a roadside check or an insurance claim, documentation will be requested.
Q: Does it make sense to add a body kit after engine tuning?
A: It’s a logical sequence for motorway-focused driving. After a power increase, the car’s behaviour at high speed changes: more thrust, same factory aerodynamics. A properly certified street-legal kit complements the engine tuning — it doesn’t replace it.
Q: Which material is best — carbon, GRP, or ABS?
A: Carbon is the lightest and stiffest, but harder to repair and more expensive. Quality GRP (fibreglass) offers a good balance of cost, repairability, and inspection compliance. ABS is the most affordable and works for visual elements. Cheap, unreinforced fibreglass is prone to cracking and detachment at speed — a risk both for technical inspections and for safety.
To put it plainly: a good aerodynamic body kit is an engineering tool with certified documentation — not a wide plastic catalogue item.
If the engine is already ready for motorway performance, it’s time to think about the handling to match. GÄN Tuning Büro offers a 50-day test drive of the tuning module with a full money-back guarantee — the longest trial period in the segment. Engine warranty up to €5,000 for 2 years — the only financially backed coverage in the industry. Engineered and manufactured in Germany since 2015. →Start your 50-day GÄN trial, risk-free
A proper car audio upgrade is built in three stages: front speakers with door sound deadening, then a subwoofer, then a DSP amplifier. This sequence delivers results — random component swaps do not. In 2026, it’s critical to preserve the manufacturer warranty and the full functionality of factory systems like BMW iDrive, VW MIB, and Mercedes MBUX.
The standard mistake is buying “something louder” and installing it at random. The result is predictable: money spent, sound unchanged, and the install visible to the naked eye.
A smart car audio upgrade in 2026 follows a different logic: front speakers and door sound deadening first, then a subwoofer, then an amplifier with DSP. Only in this sequence does the system begin to work as a unified whole.
For European car owners, three additional things matter. First — a clean install with no visible traces inside the cabin. Second — preserving all onboard electronics functions (iDrive, MIB, MBUX). Third — the dealer warranty must not be affected. According to Future Market Insights, the European car audio market is among the most mature globally — and it’s precisely the premium segment, with its high integration requirements, that’s driving growth.

When building a car sound system, money goes into the front speakers first. Rear speakers are background fill for back-seat passengers — nothing more.
Practical configurations for modern cars:
According to SpeakerDriver, OEM manufacturers across Europe are actively moving to 2- and 3-way systems even in base trim levels — this is shifting the aftermarket tuning focus toward “improve the front + add a sub + DSP” rather than a complete rebuild from scratch.
Even an expensive speaker set will underperform without proper acoustic door preparation.
Three mandatory steps:
Tweeter height and angle have a fundamental impact on the soundstage. A-pillar placement is preferable to mirror mounts: the sound arrives closer to the listener’s axis, and the stage sits higher and more precisely defined.
Car tuning is about more than sound. GÄN Tuning Büro has been developing engine tuning modules since 2015, with over 30,000 cars tuned across 8 countries. Want to find out whether there’s a GÄN solution for your car? →Find your module at gantuning.com
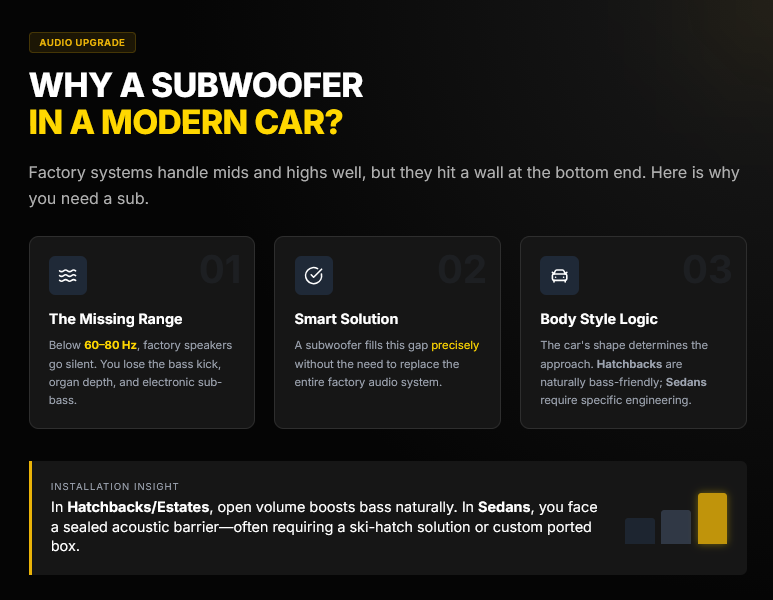
Factory audio systems in modern cars — even in non-base configurations — handle midrange and high frequencies quite well. The problem is almost always the same: below 60–80 Hz, there’s nothing. That’s where the kick of a bass guitar lives, the lower register of an organ, the sub-bass of electronic music.
A subwoofer fills that gap precisely — without requiring a full system replacement.
Body style directly determines the approach: in a hatchback or estate, the open volume between the boot and the cabin works in favor of bass, making subwoofer integration more straightforward. In a sedan — a sealed enclosure in the boot, accounting for the ski hatch or folding rear seat.
For comfortable everyday SQ use in a typical car — 300–500 W RMS. That’s more than enough with headroom to spare. SPL competition builds require 1,000+ W, but that’s a different story with different goals and a different price tag.
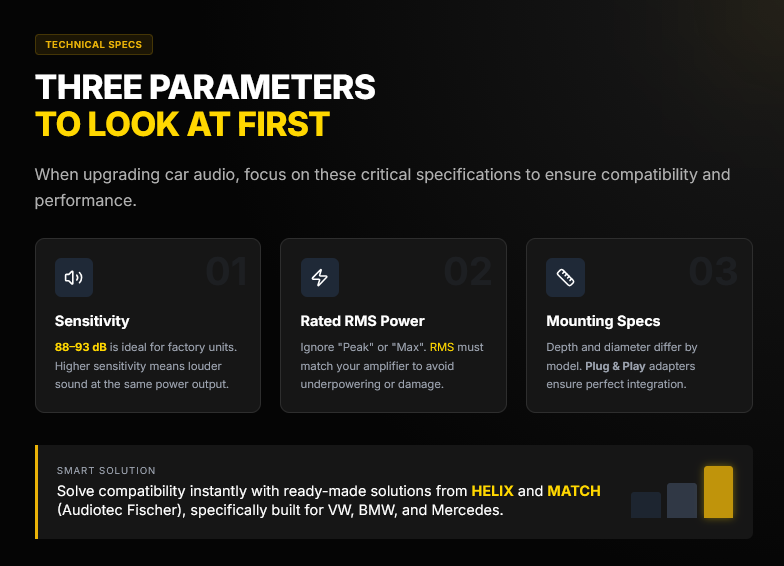
Always look at RMS. The “max power” or “peak” figures on the packaging are marketing, not engineering.
In 2026, Class D — in DSP amplifiers and mono subwoofer blocks — is becoming the primary choice across the European market. The reason is simple: space in modern cars is limited, and EVs demand careful attention to the energy budget.
For a typical SQ build:
Practical configurations: a 5- or 6-channel amplifier, or a combination of “DSP amplifier for the front + Class D mono block for the sub.” The second option offers more flexibility when dialing in the tune.
This is the key question for most modern cars. Factory systems — BMW iDrive, VW MIB, Mercedes MBUX — operate through digital buses and complex signal processing within the built-in amplifier. You simply can’t tap into the signal without losing functionality.
The solution: specialized DSP amplifiers with high-level inputs and model-specific adapters. The HELIX and MATCH lineups (Audiotec Fischer) offer ready-made Plug & Play solutions with presets for VW Group, BMW, and Mercedes. This approach preserves all factory functions — steering wheel controls, driver assists, parking sensors — and doesn’t touch the wiring or the dealer warranty.
While you’re thinking about an audio upgrade, it’s worth checking your engine’s potential at the same time. The GÄN GT tuning module for turbocharged engines increases power by up to 25% and torque by up to 25%, while reducing fuel consumption by up to 15%. IP67-rated housing, smartphone control, 5 operating modes. The module removes in 60 seconds with no trace left in the ECU — the manufacturer warranty is preserved. →Learn more about GÄN GT
| Parameter | Entry-Level Upgrade | Mid-Range SQ Build | Premium SQ |
| Front speakers | OEM speaker swap, no amplifier | 2-way kit + door treatment | 3-way Plug & Play system for your model |
| Subwoofer | Active sub under seat | 10″ in sealed enclosure, boot side | 12″ stealth enclosure, Class D mono block |
| Amplifier | Built into active sub | 4-channel AB/D + mono block | DSP amplifier + mono block, full integration |
| DSP tuning | None / manual EQ | Basic via amplifier software | Professional, tuned for cabin and driving style |
| OEM compatibility | Partial | Depends on adapters | Full, no function loss |
| Warranty impact | Risk when touching wiring | Low with Plug & Play adapters | None |
Sound is determined by speaker quality, door sound deadening, and DSP tuning. An overdriven amplifier clips the signal and physically destroys speakers. A properly matched 75-watt channel sounds better than a thoughtlessly installed 300-watt one.
A properly tuned subwoofer with a crossover point around 80 Hz and correct phase alignment is not audible as a separate source. It simply fills in the low end that was missing. Without it, the system sounds flat.
This depends entirely on the installation method. Plug & Play adapters and DSP solutions that don’t touch the factory wiring give the dealer no formal grounds to deny warranty service. The same principle applies to performance tuning: GÄN uses modules that don’t modify the ECU software and remove in 60 seconds — no traces, no flash counter reset.

Q: Where do I start if my budget is limited?
Start with door sound deadening and quality front speakers. This delivers the greatest acoustic gain per euro spent. A good 2-way kit with properly prepared doors will transform the sound more noticeably than any new head unit.
Q: Do I need to replace the factory head unit on a BMW or VW?
In most cases — no. DSP amplifiers with high-level inputs and model-specific Plug & Play adapters let you keep all factory functionality — navigation, voice control, driver assists — while significantly improving the sound.
Q: How does the approach to car audio change in electric vehicles?
Three key differences. The absence of engine noise exposes acoustic shortcomings — the bar for speaker quality rises. Weight matters: compact Class D amplifiers are preferable. And energy efficiency — amplifier efficiency directly affects range. According toFuture Market Insights, EVs have become one of the key growth drivers for aftermarket car audio in Europe in 2025–2026.
A working “premium daily” system for a VW Golf, BMW 3 Series, or Audi A3:
The system installs without touching the factory wiring. All onboard electronics functions are preserved. Dealer warranty — untouched.
In short: great sound in your car isn’t about the price of the components. It’s about a systematic approach, proper installation, and tuning calibrated to your specific cabin.
Want to upgrade your car comprehensively — both sound and performance? GÄN Tuning Büro offers a tuning module backed by an engine warranty of up to €5,000 for 2 years — the only one in the segment with financial coverage. 50-day test drive with full money-back guarantee. Developed and manufactured in Germany. → Order a risk-free GÄN test drive
A car vinyl wrap is one of the most popular ways to transform your vehicle’s appearance without any permanent consequences for the paintwork: a full colour change takes roughly a week, costs significantly less than a quality respray, and — when removed properly — leaves the factory paint almost untouched underneath. Full professional vehicle wrap cost typically ranges from €1,200 to €4,000 depending on vehicle size and material choice. That said, the gap between a well-executed wrap project and a cheap film that starts peeling within a few months is enormous — and it’s a gap worth understanding before you sign anything.
The single most important thing to understand about the vinyl wrap market is the technological split between calendered and cast films. This determines lifespan, how the material behaves on the bodywork, and the quality of the final result.
Calendered films are made by pressing a PVC compound through steel rollers. The formula contains plasticisers that gradually evaporate over time — which is where the so-called “memory effect” comes from: the material tries to return to its original flat shape. On complex body transitions, deep character lines and tight radii, a calendered film slowly but inevitably pulls back. Edges lift, raised areas develop creases. You can work with them, but their sensible application is limited to flat panels, promotional graphics and short-term wraps lasting one to two years.
Cast films are produced in an entirely different way: liquid PVC is poured in a thin layer onto a carrier and cured in a controlled environment. The finished material is significantly more elastic, thinner, and free of any meaningful memory effect. It conforms to the three-dimensional geometry of the bodywork — doors, wheel arches, bumpers — without the built-up tension that causes shrinkage. Leading brands: 3M, Avery Dennison, Oracal 970 RA, Hexis, Mactac. Professional studios use cast films exclusively for full, long-term vehicle wraps.
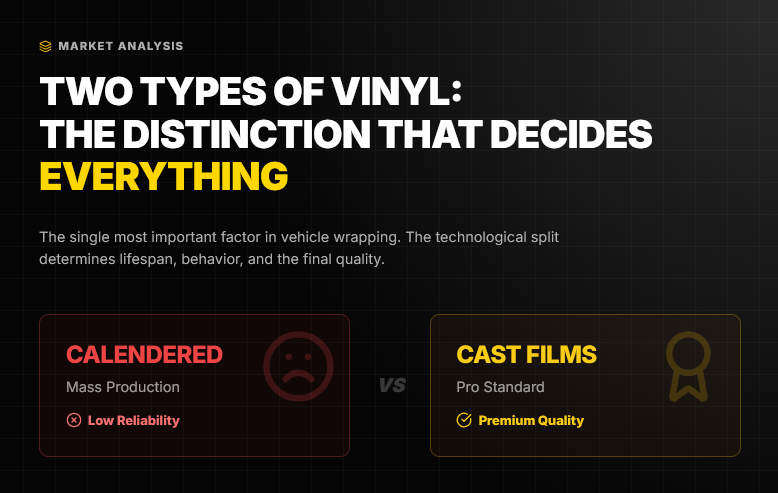
The short rule: for a full wrap expected to last more than four years, cast films only. Calendered films save money upfront and cost more in the long run.
By purpose, the market also divides into three categories:
Vehicle wrap cost on the European market in 2025–2026:
| Type of work | Small car (Polo, Mini) | Mid-size (BMW 3 Series, Audi A4) | SUV / Van |
| Full colour wrap | €1,200–1,800 | €1,800–3,000 | €2,200–4,000 |
| Partial wrap (roof, bonnet, mirrors) | €300–600 | €400–800 | €500–900 |
| PPF – front protection kit | €800–1,200 | €1,000–1,600 | €1,200–2,000 |
| Full PPF (entire vehicle) | €3,000–4,500 | €4,000–6,000 | €5,000–7,500 |
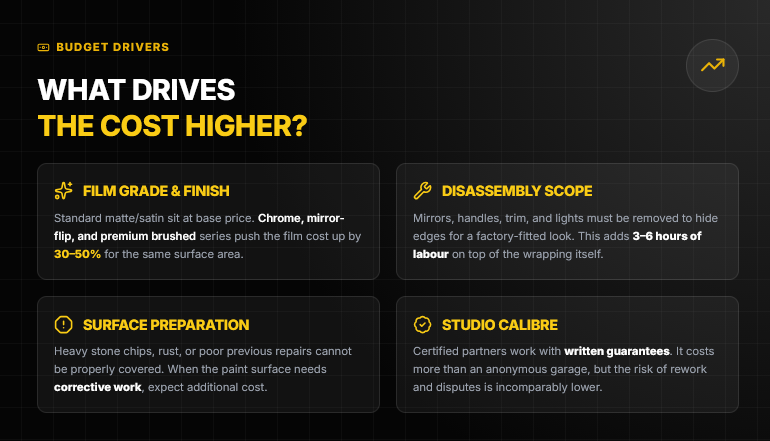
What drives the vehicle wrap cost higher:
Film grade and finish. Standard matte and satin tones from established brands sit at the base price level. Chrome, mirror-flip and premium brushed series push the film cost up by 30–50% for the same surface area.
Disassembly scope. A professional result requires removing mirrors, door handles, trim strips, sometimes lights and bumpers — edges are hidden behind panels so the wrap looks factory-fitted rather than applied on top. That adds three to six hours of labour on top of the wrapping itself.
Surface preparation. Heavy stone chips, rust edges or poor previous repairs cannot be properly covered. When the paint surface needs corrective work beforehand, expect additional cost.
Studio calibre and location. Certified installer partners of film manufacturers work with written guarantees on both material and application. It costs more than an anonymous garage, but the risk of rework and disputes when it’s time to remove the wrap is incomparably lower.
Compared to a full respray: a quality paint job with full disassembly takes roughly the same or more than a full car vinyl wrap, takes longer, and is irreversible. At resale, factory paint commands a higher value. The wrap wins precisely because it can be undone.
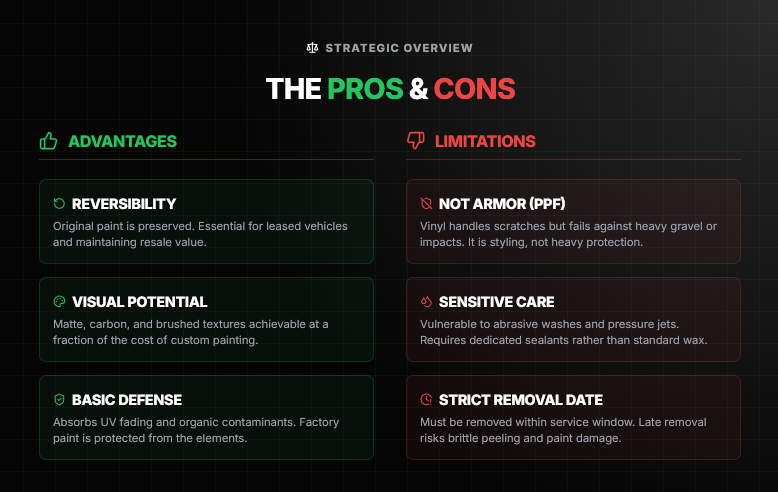
Real-world experience from wrap owners paints a clear picture. Choose the right material and a competent studio, and you’ll almost certainly be satisfied. Cut corners on either — and you’ll regret it. Here are the genuine car wrap pros and cons, without the marketing gloss.
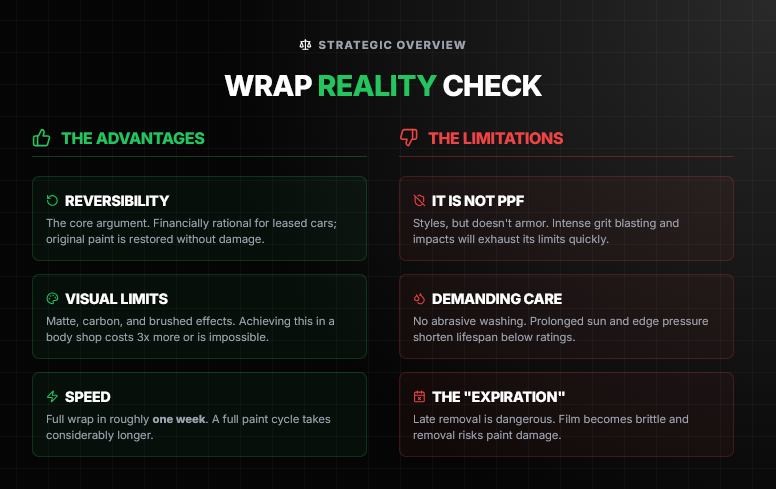
Reversibility — the core argument. The original paint can be restored without damage, provided the removal is done on time and correctly. For leased vehicles or new cars that will be resold, this isn’t just convenient — it’s financially rational.
Visual possibilities beyond paint. Matte finishes, pseudo-carbon textures, colour-shifting films, brushed-metal effects — achieving these in a body shop costs several times more, or simply isn’t possible at all. A carbon-look roof or an unconventional matte bonnet is achievable tuning without an astronomical budget.
Basic paint protection. The film absorbs minor scratches, low-speed stone chips, UV fading and aggressive organic contamination (bird droppings, tree sap). When removed on schedule, the factory paint underneath is often in better condition than on untreated cars of the same age.
Speed. A professional studio completes a full wrap in roughly one week. A full paint cycle with bodywork preparation takes considerably longer.
It is not PPF. Vinyl wrap handles minor scratches and low-speed chips. Larger road debris, intense grit blasting and parking contact impacts will exhaust its limits quickly. If genuine protection under daily hard use is the goal, PPF is the correct answer — not a colour-change vinyl.
Lifespan depends heavily on care. Aggressive pressure washing at the edges, abrasive shampoos, prolonged parking in direct sun — all of these shorten the film’s lifespan below its rated value. Recommended care: touchless washing, a dedicated film sealant instead of wax, and prompt removal of bird droppings and sap.
Memory effect with calendered films. If the studio cut costs on the film, edges in character lines will start lifting within six to twelve months. Fixing it costs more than the price difference between a cast and a calendered film in the first place.
Buyer scepticism at resale. A segment of the used-car market views a fully wrapped vehicle with suspicion — potential bodywork repairs, commercial history. The fix is simple: photographs of the paintwork condition before wrapping, plus documentation of the job.
Late removal. A film left on too long becomes brittle and peels in fragments. Removal becomes far more labour-intensive and the risk to the paint increases significantly. The four-to-six-year lifespan for cast films is not a guideline — it’s the actual service window after which replacement is the right call.
The vinyl wrap vs paint question comes up in almost every consultation, and the honest answer is: it depends on what problem you’re actually trying to solve.
Choose vinyl wrap when:
Choose paint when:
Choose PPF when:
In practice, vinyl wrap vs paint isn’t really a competition. They solve different problems. The mistake is applying the wrong solution to the wrong problem.
Understanding the process helps you assess whether a given studio’s quote is fair — and why “wrapped in three days” at a suspiciously low price should give you pause.
Inspection and consultation. A good studio starts by assessing the paint condition: stone chips, lifting edges, rust — all of these will show through the film and affect the outcome. Material type, brand and project goal are agreed at this stage.
Detailing and surface prep. Thorough touchless washing, iron fallout removal, decontamination of bitumen, wax residue and silicone. Critical point: any grease or contamination left under the film will eventually cause bubbling and adhesion failure. This step cannot be rushed.
Panel removal. Mirrors, door handles, trim, sometimes tail lights and bumpers are taken off so the film edges can be hidden behind the panels. The result looks factory-fitted, not surface-applied.
Wrapping. Cutting, positioning, squeegee smoothing, heat-gun forming in character lines and transitions — methodical work without shortcuts. This is where hands-on experience is decisive.
Post-treatment and quality check. Re-heating critical areas, removing any remaining air pockets, applying a film-specific sealant if required (not standard car wax).
Curing period. The first 24–48 hours without washing or rain: the adhesive layer completes its bond. A professional studio will walk you through the aftercare requirements before you drive away.
DIY attempts most often fail at the heat-forming stage: without proper experience using a heat gun, cast films won’t lay into complex transitions — creases and whitish hazing from overheating are the typical result.
A full colour change via car vinyl wrap constitutes a formal change to the vehicle’s external appearance. In many European countries, this requires updating the vehicle registration document. Specific requirements vary by country and local authority — check with your registration office before committing to a full colour-change wrap.
Standard vinyl films with fire-safety certifications don’t require separate technical approval. The exception is mirror-finish, chrome and highly reflective materials: restrictions may apply due to glare risk, and manufacturer documentation may be required.
For insurance purposes: the cost of the wrap is factored into restoration calculations in the event of a claim — provided it’s documented. A wrapped vehicle will be assessed accordingly under comprehensive cover.
Owners who approach vehicle modification seriously rarely stop at one change. A wrap answers “how does it look?” — chiptuning answers “how does it perform?” These are separate categories with separate budgets and separate outcomes, but the underlying logic is the same: get more from your vehicle.
GAN Tuning has been developing tuning modules for turbocharged and naturally aspirated engines since 2015. Over that period, more than 30,000 vehicles across 8 countries have been tuned with GAN. TheGAN GT module connects to the pressure sensors and fuel rail — without any intervention in the ECU. Power gain up to 25%, torque up to 25% for turbocharged engines (CommonRail diesel and turbo petrol).Installation takes 10–15 minutes. Removal takes 60 seconds — without leaving any electronic or mechanical trace.
That last point is what separates GAN from an ECU remap: the manufacturer warranty remains intact because the ECU is never touched. Before a dealer visit, the module comes off faster than the mirrors come off before a wrap.
For naturally aspirated engines — GAN GA+ via OBD-II: up to 12% power gain, smartphone control across 3 modes.
Both GAN products come with a50-day trial period and full refund if you’re not satisfied — the longest in the segment. Plus 2 years of engine warranty: up to €5,000 for GAN GT, up to €3,000 for GAN GA+. No other tuning product on the market offers financial engine cover — there are no comparable alternatives.
Does a car vinyl wrap affect the manufacturer warranty? Vinyl film has no effect on the vehicle’s mechanics or electronics and is not a grounds for warranty refusal. The same logic applies to the GAN tuning module: it’s removed in 60 seconds before any dealer visit, leaves no trace in the ECU — the dealer finds nothing out of the ordinary. More answers in theGAN Tuning FAQ.
How long does a car vinyl wrap last on a BMW 3 Series or Mercedes C-Class? With a premium cast film and correct aftercare — four to six years in real-world use. Most professional studios offer a two-to-three year guarantee on both material and labour. After five to six years, plan for replacement: removing a film that’s still within its service window is far easier and cheaper than dealing with one that has hardened and become brittle.
Vinyl wrap vs paint — which holds up better long-term? Paint wins on permanence and on heavily damaged bodywork. Vinyl wins on reversibility, access to effects that paint can’t replicate, and speed of execution. For serious daily-use protection, PPF is the correct answer — not a colour-change vinyl. Neither wrap nor paint is categorically better; they serve different purposes.
Does chiptuning make sense alongside a wrap? Yes — both modifications are independent of each other and don’t interfere in any way. TheGAN product overview shows which module fits your engine. If you’re doing the wrap first, the GAN module can be added at any point —ordering and delivery take just a few days.
Vinyl wrapping is a rational choice under three conditions: cast material from a reputable manufacturer, a professional studio with a warranty, and a realistic horizon of 4–5 years before replacement. When these conditions are met, a wrap delivers exactly what it promises: a fresh look, protected paintwork, and full reversibility.
For those also considering a performance upgrade — find a compatible GAN module for your engine at gantuning.com.
Want more power from your car? There are basically two ways to do it: plug in an additional control unit, or mess with your factory ECU software. One of these keeps your warranty. The other one doesn’t.
Let me break down what actually happens with each method, because there’s a lot of confusion out there.
Chip tuning modifies your vehicle’s electronics to increase speed and power. Sometimes – like with commercial trucks or tractors – the goal is cutting fuel consumption instead. But for most people, it’s about getting more punch when you hit the gas.
Method 1: Additional control unit (external chip)
You install a separate device that sits between your engine sensors and the factory ECU. Nothing gets permanently changed.
Method 2: OBD tuning (ECU remapping)
A technician rewrites your factory ECU software through the diagnostic port. Your original programming gets replaced.
The difference matters more than you’d think.
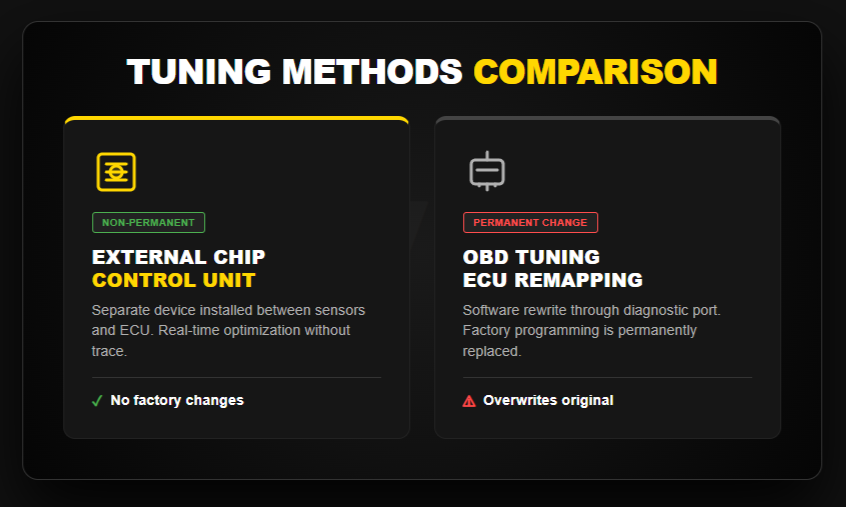
An external tuning chip connects to your engine and talks to your factory ECU. No cutting wires, no opening up the ECU itself. The chip reads signals from engine sensors – things like air pressure, temperature, fuel flow – and adjusts them in real time before they reach your factory computer.
What’s happening under the hood? The chip tweaks fuel injection timing, turbo boost pressure, and ignition advance. Your engine produces more power and torque without crossing into dangerous territory.
Here’s the part that matters: your engine’s protective programs stay active. The factory ECU still monitors everything and will cut power if something goes wrong. Your original software? Completely untouched. Dealers can’t tell you’ve been running a chip if you remove it before servicing.
Real-world performance from GAN modules tested on 30,000+ vehicles:
| Engine Type | Power Gain | Torque Gain | Fuel Economy Change |
| Turbocharged gasoline | Up to +30% | Up to +30% | Up to +15% better |
| Naturally aspirated | Up to +12% | Up to +15% | Up to +10% better |
| Diesel | Up to +30% | Up to +35% | Up to +15% better |
Installation takes 10-15 minutes. You literally plug it in and drive.
OBD tuning accesses your factory software through the diagnostic port. The technician pulls the program from your ECU or flash memory, edits it on a computer with specialized software, then writes the modified version back to your ECU.
Some things OBD tuning can do that external chips can’t: remove the factory speed limiter completely, optimize for heavily modified engines (bigger turbos, upgraded injectors), and sometimes squeeze out 2-3% more power at the absolute top end.
Sounds good, right? Hold on.
Most OBD tuning disables or modifies your engine’s safety systems. Why? Because those systems limit power to protect components. Remove the limits, get more power, but also remove the safety net.
Opening up the ECU to bypass security on modern cars is where things get risky. These are fragile electronics. One wrong move during the process and your ECU can brick. Your car won’t start. Or worse – it works fine for a few weeks, then fails randomly.
I’ve talked to engineers with over 20 years in engine calibration. They all say the same thing: the biggest risk isn’t the tune itself, it’s corrupted ECU software during the flashing process.
And here’s something tuners don’t advertise: manufacturers have gotten smart. Most brands now include anti-tuning detection in their diagnostic systems. The factory software has specific markers. Change the software, and those markers disappear. When you show up for warranty service, the dealer plugs in their diagnostic tool and immediately sees your ECU has been modified. Warranty void.
Real risks with OBD tuning:
Look, if you’re building a race car with €10,000 in engine modifications, OBD tuning might make sense. You’re already way past warranty concerns.
For everyone else? External control units are the smarter play. GAN’s been doing this since 2015 across 8 countries, and what they’ve learned is pretty clear.
Your warranty stays intact. The chip is plug-and-play – connect it, drive it, pull it out before dealer visits. Leaves zero mechanical or electronic traces. Dealers literally cannot tell.
Safety’s built in. GAN backs their modules with an additional 2-year engine warranty up to €5,000. They wouldn’t do that if the modules caused engine damage.
You get 5 free reprogramming sessions. Switch cars? Just reprogram the same chip for your new vehicle. You might need a different sensor cable (costs about 3,000 rubles), but the chip itself works across different cars.
Smartphone control changes everything. Pick Sport mode for maximum power, Dynamic for balanced performance, ECO when you want better fuel economy, or Stock to completely disable the chip. There are 18 fine-tuning modes if you want to dial in exactly what you need.
The 50-day test drive eliminates risk. Try the chip for almost two months. Don’t like it? Changed your mind? Return it within 50 days for a full refund.
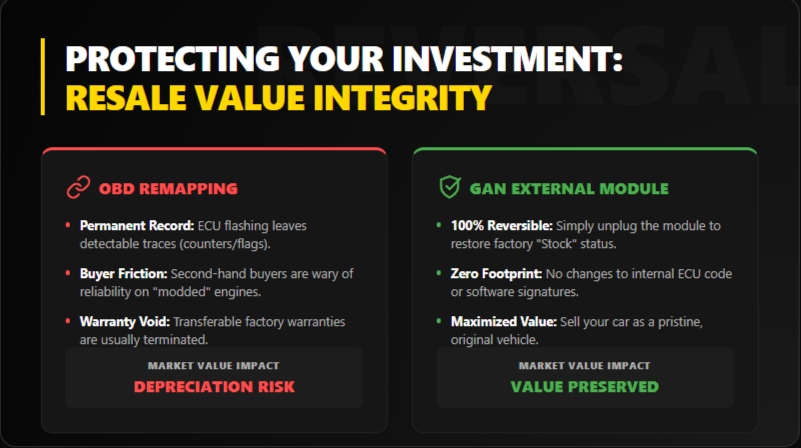
OBD tuning gives you maybe 2-3% more power at the extreme top end. You lose your warranty, risk bricking your ECU, and disable safety systems. External chips give you up to 30% on turbocharged engines, keep your warranty valid, and you can remove them anytime with zero trace.
For most drivers, that’s not even a close decision.
You can calculate your specific car’s potential power increase on GAN’s website. Just plug in your make, model, and engine – takes about 30 seconds.
You want more power from your car. Fair enough. There are basically two ways to get it: mechanical modifications or electronic tuning. One costs thousands and takes weeks. The other costs hundreds and takes 15 minutes.
Let me explain what each method actually involves and what you can realistically expect.
Tuning just means modifying your car to improve performance or appearance. Could be suspension upgrades for better handling, brake upgrades for better stopping, body modifications for looks, or engine modifications for more power.
Engine tuning is what most people mean when they talk about tuning. It’s modifying the engine to produce more power output than it did from the factory.
Modern engines are controlled by the ECU – a computer that manages fuel injection, ignition timing, boost pressure (if turbocharged), and dozens of other parameters. Change what the ECU does, and you change how the engine performs.
Traditional engine tuning involves physically changing engine components to increase displacement or improve airflow.
Boring and stroking – increasing cylinder diameter and piston stroke to increase displacement. A 2.0L engine becomes 2.2L, producing proportionally more power. Cost: €3,000-8,000 depending on complexity.
Forced induction – adding a turbocharger or supercharger to naturally aspirated engines. Compresses intake air to force more oxygen into cylinders. Cost: €4,000-10,000+ for quality kits with proper tuning.
Camshaft upgrades – changing valve timing to improve airflow at specific RPM ranges. Usually increases high-RPM power at the expense of low-RPM torque. Cost: €1,500-4,000 including installation.
Intake and exhaust modifications – larger throttle body, less restrictive air filter, free-flowing exhaust. Improves airflow but gains are modest (5-10% typical). Cost: €800-2,500.
Head porting and polishing – reshaping intake and exhaust ports for better flow. Labor-intensive, requires engine disassembly. Cost: €2,000-5,000.
Big power gains require combining multiple modifications. Just adding an exhaust won’t do much. You need exhaust + intake + camshaft + ECU tuning to see meaningful results, which means €5,000+ investment.
Reliability decreases. You’re putting more stress on components that weren’t designed for higher power levels. Expect shorter engine lifespan and more frequent maintenance.
Resale value often decreases. Most buyers don’t want a heavily modified engine with unknown reliability.
Warranty completely void. Dealers won’t touch anything powertrain-related once they see modifications.
Makes sense for: dedicated track cars, project builds where cost isn’t the primary concern, or specific applications requiring power levels that can’t be achieved through tuning alone.
Modern engines produce way less power than their hardware can handle. Manufacturers deliberately program conservative limits into the ECU for various reasons – global market compatibility, warranty cost reduction, emissions compliance, and model differentiation.
Example of manufacturer detuning:
VW’s 2.0 TDI diesel appears in multiple models with power outputs ranging from 115 HP to 190 HP. Same physical engine, same turbocharger, same fuel injectors. The only difference is ECU programming. They’re using software to create an entire model lineup from one engine design.
Electronic tuning unlocks this artificially restricted performance by changing ECU parameters – either by reprogramming the ECU software (ECU remapping) or by using an external module that modifies sensor signals (chip tuning).
Two approaches to electronic tuning:
Connect to the ECU via diagnostic port, extract the factory software, modify calibration parameters on a computer, write the modified software back to the ECU.
Install a separate device between engine sensors and the factory ECU. Module intercepts sensor signals, modifies them based on programmed algorithms, sends altered signals to the ECU.
Let me give you actual numbers from GAN’s testing on over 30,000 vehicles since 2015, because marketing materials always exaggerate.
| Engine Type | Chip Tuning Module | ECU Remapping | Mechanical Mods |
| Turbocharged gasoline | +20-30% | +22-32% | +40-100%+ |
| Turbocharged diesel | +25-30% | +27-33% | +40-100%+ |
| Naturally aspirated | +10-12% | +11-13% | +15-50%+ |
If you’re driving a turbocharged street car under warranty and want 20-30% more power, chip tuning with an external module gives you 95% of the maximum possible gains with none of the permanent consequences.
If you’re building a dedicated track car or heavily modified street car, ECU remapping gives you the control needed to tune for upgraded components.
If you want power levels that exceed what tuning alone can achieve, mechanical modifications are necessary.
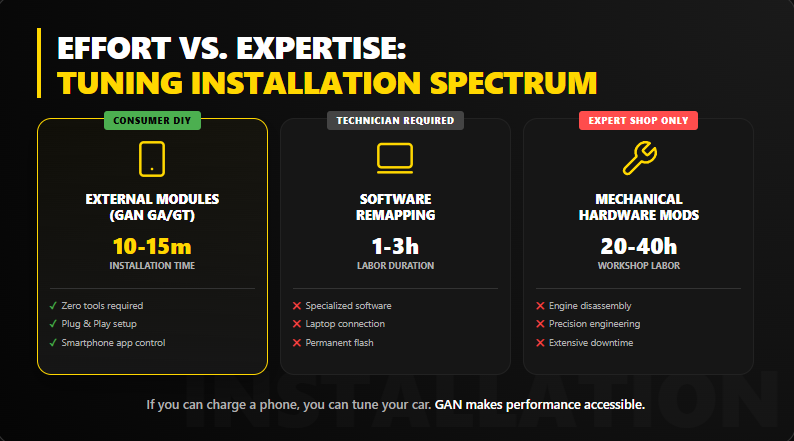
Reality from GAN’s experience: most warranty claims get honored if the module isn’t physically installed during inspection.
Reality: dealers will refuse any powertrain-related warranty claim once they see the ECU has been modified.
Reality: expect zero warranty coverage for anything after installing mechanical modifications.
GAN provides external tuning modules tested on 30,000+ vehicles since 2015 across 8 countries.
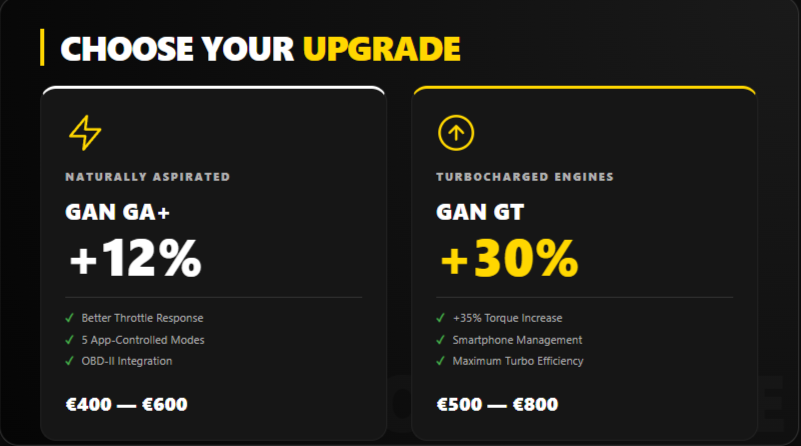
GA+ module (naturally aspirated engines):
Up to 12% power increase, improved throttle response, multiple modes via app. €400-600 typical pricing.
GT module (turbocharged engines):
Up to 30% power increase, up to 35% torque increase, smartphone control with 5 modes. €500-800 typical pricing.
Standard features:
Vehicle requirements:
Year 2000 or newer, fuel-injected engines (naturally aspirated, common-rail diesel, or turbocharged gasoline). Works with automatic and manual transmissions.
Most people wanting 20-30% more power from a street car should start with chip tuning using an external module. You get 95% of the maximum possible gains for 20% of the cost of mechanical modifications, with complete reversibility and warranty preservation.
ECU remapping makes sense if you need custom tuning for heavily modified engines or don’t care about warranties.
Mechanical modifications make sense if you need power levels beyond what tuning can achieve (50%+ gains) and accept significantly reduced reliability and resale value.
Don’t believe anyone promising 50% power gains from chip tuning alone – that’s not physically possible on most stock engines. Real gains on turbocharged engines top out around 30%, naturally aspirated around 12%.
Based on testing 30,000+ vehicles, these are realistic numbers you can actually achieve.
Most chip tuning articles are written by companies selling tuning services. They highlight benefits and downplay risks because they want your money. This article is different.
I’m going to explain what chip tuning actually does, compare the two main methods honestly, and discuss the real risks to warranties and engine longevity. What you do with this information is your decision.
Chip tuning modifies your car’s electronics to increase power output. Sometimes – particularly with commercial vehicles or agricultural equipment – the goal is reducing fuel consumption instead. But for most people, it’s about getting more power from the engine they already have.
There are two fundamentally different approaches: adding an external control module, or reprogramming your factory ECU software. These methods work differently, have different risks, and affect warranties differently.
Understanding the real differences matters because marketing materials often blur them together.
An external module (sometimes called a tuning box or chip) connects between your engine sensors and your factory ECU. It intercepts sensor signals, modifies them based on programmed algorithms, then sends the altered signals to the ECU.
Your boost pressure sensor reads 1.5 bar. The module intercepts this signal and changes it to 1.3 bar before sending it to the ECU. The ECU thinks boost is low, so it requests more boost pressure to compensate. Actual boost climbs to 1.8 bar, producing more power.
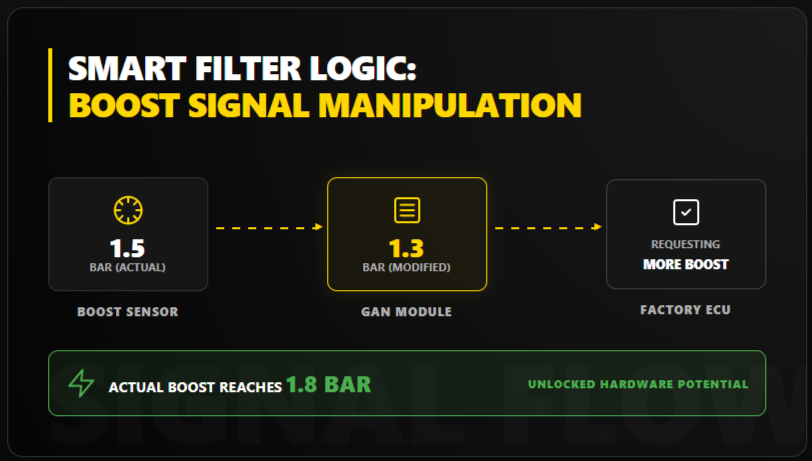
The limitation: external modules can only work within the parameters the factory ECU allows. If the ECU has hard limits programmed in (maximum fuel injection duration, maximum boost pressure, etc.), the module can’t exceed those limits without the ECU throwing error codes.
ECU remapping (also called ECU flashing or OBD tuning) involves pulling the factory software from your ECU, modifying the calibration parameters on a computer, then writing the modified software back to the ECU.
Fuel maps (how much fuel to inject at various RPM and load conditions)
Ignition timing maps (when to fire spark plugs)
Boost pressure limits (maximum allowed turbo boost)
Torque limiters (often disabled completely)
Speed limiters (often removed)
Safety parameters (often modified or disabled)
Factory ECU software is permanently modified
Can remove hard limits that external modules can’t bypass
Potentially 2-3% more power than external modules at absolute maximum
Leaves permanent traces in ECU diagnostic logs
Voids warranty – dealers can detect the modifications
Requires reflashing to return to stock (costs money, risks ECU damage)
The advantage: complete control over all ECU parameters. The disadvantage: permanent modification with permanent consequences.
Here’s the comparison most tuning companies won’t give you because it doesn’t make one method look clearly superior.
| Factor | External Module | ECU Remapping |
| Maximum power gain | Up to 30% (turbo) / 12% (NA) | Up to 32% (turbo) / 13% (NA) |
| Warranty impact | Technically preserved if removed | Immediately void, detectable |
| Safety systems | All factory systems remain active | Often disabled or modified |
| Reversibility | Instant (unplug) | Requires paid reflash |
| Installation risk | Zero ECU damage risk | Can brick ECU during flash |
| Cost (initial) | €300-800 typical | €400-1000 typical |
| Cost (reversal) | €0 (just unplug) | €300-500 (reflash required) |
| Adjustability | Multiple modes via app | Fixed tune unless reflashed again |
| Detection by dealers | Impossible when removed | Easily detected in ECU logs |
Based on GAN’s testing on over 30,000 vehicles since 2015, the performance difference between good external modules and good ECU remapping is typically 2-3% at most. That’s within measurement error on most dynos.
The real differences are warranty preservation, safety systems, and reversibility – not ultimate power output.
This is where marketing materials get deliberately vague. Let me be specific.
Your factory ECU and its software are never modified. When you remove the module before a dealer service appointment, there is literally nothing in the ECU’s memory indicating it was ever connected. No software version changes, no modified checksums, no error codes, no flags.
Can the dealer void your warranty? Only if they physically see the module installed during inspection, AND they can prove it caused the specific problem you’re claiming. If your stereo breaks and they happen to spot a tuning module, they can’t refuse the stereo repair unless they prove causation.
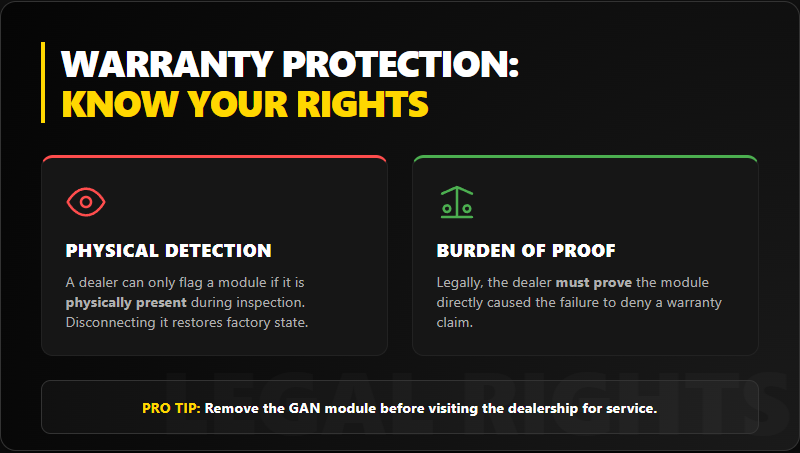
Reality from GAN’s experience across 8 countries: most warranty claims with external modules get honored because dealers can’t prove causation for unrelated failures, and most owners remember to remove modules before service.
The moment you reflash the ECU, permanent digital fingerprints appear. When dealers plug in their diagnostic equipment, they see: software version doesn’t match factory specifications, calibration dates show recent modifications, sometimes specific anti-tuning flags.
There’s no hiding it. Even if you pay to reflash back to stock, dealers can often detect that the ECU was previously modified through software version history.
Can the dealer void your warranty? Yes, immediately, for any powertrain-related claim. They don’t need to prove the remapping caused the problem – just that you modified the car contrary to manufacturer specifications.
Reality: ECU remapping voids powertrain warranties. Anyone telling you otherwise is lying.
Will chip tuning reduce your engine’s lifespan? The honest answer: it depends on several factors.
Higher cylinder pressures (more stress on pistons, rings, bearings)
Higher exhaust gas temperatures (more stress on valves, turbocharger)
More frequent high-load operation (more stress on all components)
Running the engine outside safe parameters (knock, over-boost, excessive EGT)
GAN modules stay within manufacturer-safe mechanical limits. Turbochargers rated for 2.0 bar aren’t pushed past 1.8 bar. Fuel injectors rated for 2200 bar aren’t pushed past 2000 bar. Factory safety systems remain active to protect against knock, over-temperature, and other dangerous conditions.
Engineers with over 20 years of calibration experience designed these limits specifically to avoid accelerated wear. That’s why GAN offers a €5,000 engine guarantee for 2 years – they’re confident the modules won’t cause premature failures.
This depends entirely on who did the tuning and how conservative they were. Good tuners with dyno testing and proper calibration can create safe maps that don’t significantly increase wear. Bad tuners who just increase boost and fuel without proper testing can create maps that destroy engines.
The problem: you can’t easily verify tuner quality before paying them. And many tuners disable safety systems (knock control, EGT limits, torque limiters) to squeeze out maximum power, which directly increases engine wear.
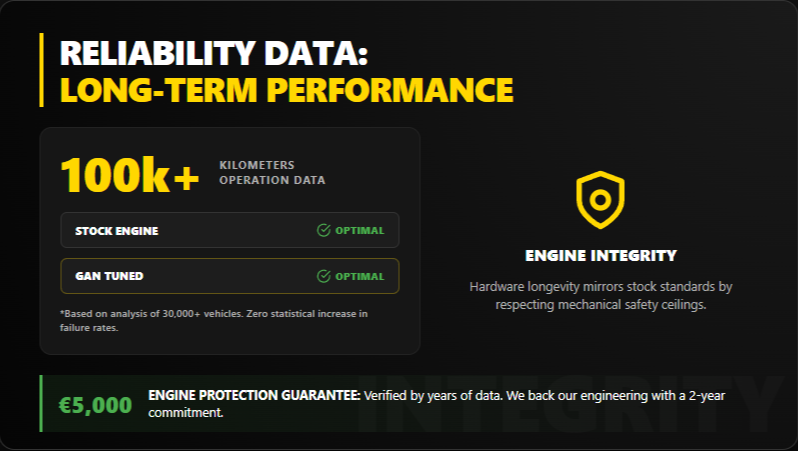
Engines with external modules show no statistically significant difference in failure rates compared to stock engines over 100,000+ km of operation. The €5,000 guarantee backs this up – if failures were common, they couldn’t afford to offer it.
ECU remapping results vary wildly depending on tuner quality. Well-done remapping shows similar longevity to stock. Poorly done remapping shows increased failures, particularly turbocharger and piston failures.
Risk 1: ECU damage during flashing
Remapping requires communicating with the ECU over the OBD port or by directly accessing the ECU’s circuit board. If this process gets interrupted (battery voltage drop, connection problem, software error), you can corrupt the ECU software. Your car won’t start. The ECU needs replacement (€800-2000 depending on model) or recovery (€300-500 if possible).
This happens. Not often, but it happens. External modules have zero risk of this because they never communicate with the ECU – they just modify sensor signals.
Risk 2: Poor calibration destroying engines
Bad ECU remapping can request power levels that exceed component limits. Too much boost pressure damages turbochargers. Too much cylinder pressure cracks pistons. Too lean fuel mixtures burn valves. Too advanced ignition timing causes detonation.
Bad external modules can cause similar problems, but they’re limited by factory ECU safety systems. The factory ECU will throw error codes and enter limp mode if parameters get dangerous. With ECU remapping, those safety systems are often disabled.
Risk 3: Fuel quality dependency
More aggressive tuning requires better fuel quality. If you’re tuned for 98 octane and fill up with 95 octane, knock can occur. Stock ECU programming includes knock control that retards timing when knock is detected. Many ECU remaps disable or reduce this safety feature to maximize power.
External modules typically leave knock control active, so the engine protects itself if fuel quality drops.
GAN recommends external modules over ECU remapping for most drivers because:
But ECU remapping makes sense in specific situations: heavily modified engines (upgraded turbo, bigger injectors, etc.) that exceed what factory ECU parameters allow, or competition vehicles where warranty doesn’t matter and maximum power is the only goal.
For street-driven cars under warranty, external modules are the lower-risk option. This isn’t marketing – it’s risk analysis.
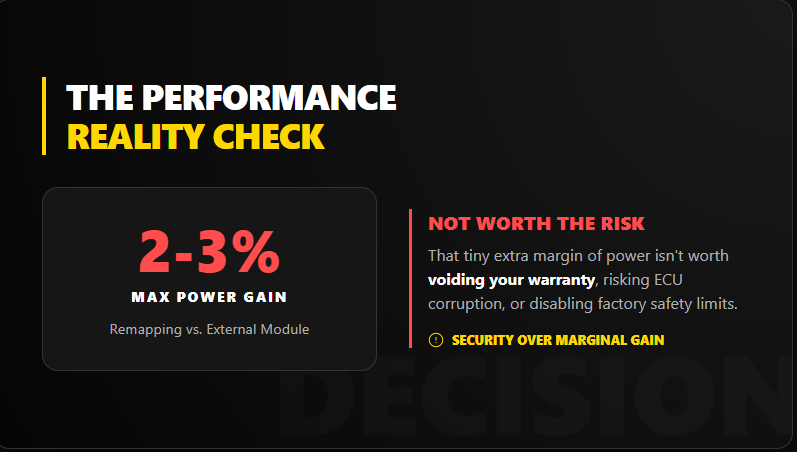
Don’t expect magic. Chip tuning unlocks performance headroom manufacturers deliberately left unused, but it doesn’t violate physics.
The difference between good and bad outcomes is choosing quality tuning from companies with extensive testing data, not budget solutions from unknown tuners.
External modules and ECU remapping both increase power. They work differently, have different trade-offs, and suit different situations.
For most street-driven cars: external modules preserve warranties, maintain safety systems, and deliver 95% of the power gains with none of the permanent consequences.
For heavily modified competition cars: ECU remapping provides the complete control needed to tune for upgraded components.
GAN’s recommendation is based on 30,000+ vehicles tested since 2015 across 8 countries. External modules produce reliable results with minimal risk for the vast majority of drivers.
What you do is your decision. At least now you have honest information to base it on.
Naturally aspirated engines gain less from chip tuning than turbocharged engines. That’s just physics. You’ll see around 10-12% power increase, maybe 15% torque increase at best.
But that 10-12% is still worth having. Let me explain what’s actually possible with naturally aspirated engines and why the gains are limited compared to turbocharged motors.
A naturally aspirated engine (sometimes called atmospheric or NA) relies on normal atmospheric pressure to fill the cylinders with air. No turbocharger forcing air in, no supercharger compressing it – just pistons moving down and creating vacuum that sucks in outside air.
How it works:
Piston moves down on the intake stroke, creating low pressure in the cylinder. Atmospheric pressure (about 1.0 bar at sea level) pushes air through the intake valve to equalize the pressure. That air mixes with fuel and combusts on the power stroke.
This is the original engine design from the late 1800s. It’s mechanically simple, reliable, and still used in the majority of cars on the road today. Why? Because naturally aspirated engines are cheaper to manufacture, easier to maintain, and have fewer components that can fail compared to forced induction setups.
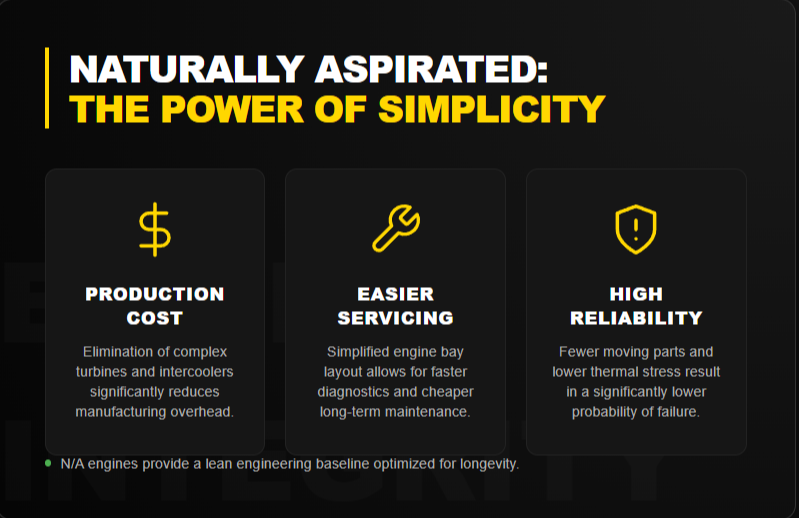
The fundamental limitation is air. To make more power, an engine needs to burn more fuel. To burn more fuel, you need more oxygen. With a naturally aspirated engine, you’re stuck with atmospheric pressure – you can’t force more air into the cylinders without adding a turbocharger or supercharger.
The math:
Your 2.0-liter engine draws in 2.0 liters of air per complete rotation at atmospheric pressure. That’s fixed by the laws of physics. You can optimize how efficiently the engine uses that air, but you can’t increase the total amount without forced induction.
Turbocharged engines don’t have this limitation. A turbo can push 1.5 bar, 1.8 bar, even 2.0 bar of air into the same 2.0-liter engine. Now you’ve got 3.0-4.0 liters worth of air molecules in a 2.0-liter space, which means you can burn twice as much fuel and make twice as much power. That’s why turbocharged engines see 20-40% gains from tuning while naturally aspirated engines max out around 10-12%.
| Engine Type | Typical Power Gain | Typical Torque Gain | Why |
| Naturally aspirated | +10-12% | +12-15% | Limited by atmospheric pressure |
| Turbocharged gasoline | +20-30% | +25-30% | Boost pressure increase possible |
| Turbocharged diesel | +25-30% | +30-35% | High boost headroom, strong internals |
These numbers come from GAN’s testing on over 30,000 vehicles since 2015.
Since you can’t add more air, chip tuning for naturally aspirated engines focuses on optimizing what you’ve got.
Throttle response optimization. The module accesses more aggressive throttle maps in the factory ECU. Manufacturers program these maps in but restrict access to them. When you press the throttle 30%, the ECU might only open the throttle body to 25% with stock programming. After tuning, that same 30% pedal input opens the throttle body to 30% or even 32%, giving sharper response.
Fuel delivery tuning. The module optimizes fuel injection timing and duration for better combustion efficiency. This doesn’t mean dumping in more fuel randomly – it means injecting at the optimal moment in the combustion cycle and atomizing it better for more complete burning.
Ignition timing advance. The module allows more aggressive ignition timing (firing the spark plugs earlier in the compression stroke) when conditions are safe. This extracts more energy from the same amount of fuel.
Variable valve timing optimization (if your engine has it). Many modern NA engines use VVT to change valve opening/closing timing. The module can access more aggressive VVT maps for better cylinder filling and exhaust scavenging.
All these changes combined give you that 10-12% power increase. It’s not huge, but it’s noticeable in daily driving.
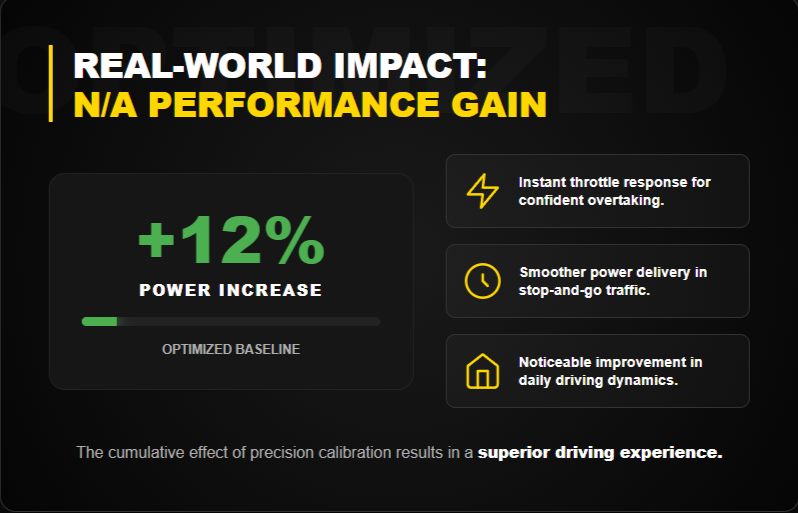
That 10-12% power increase translates to real-world improvements, especially in specific situations.
Real-world example from GAN testing:
That extra 18 HP doesn’t sound like much, but the wider torque curve and sharper throttle response make the car feel significantly more responsive in normal driving.
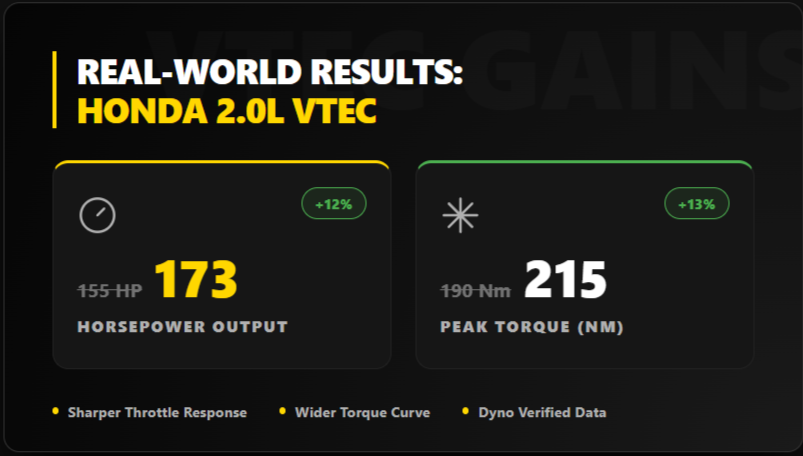
NA engines typically see modest fuel economy improvements after chip tuning, assuming you drive the same way you did before.
The improvement comes from better throttle response and a flatter torque curve. You spend less time at high RPM because the engine pulls adequately at lower RPM. Less high-RPM operation = less fuel consumption.
Realistic fuel economy changes:
The fuel economy benefit is smaller than with turbocharged engines because you’re not gaining the efficiency advantage of staying in higher gears at lower boost. But conservative drivers do see measurable savings.
GAN GA+ connects via your OBD-II port and takes about 10-15 minutes to install. No special tools required, no permanent modifications.
Five driving modes accessible via smartphone app – Sport (maximum power), Dynamic (balanced), Eco (fuel economy priority), Custom (adjust parameters yourself), Stock (module disabled).
Five free reprogramming sessions. If you sell your car and buy another naturally aspirated vehicle, just reprogram the same module for the new car. You might need a different connection cable (costs about €50-80) but the module itself transfers.
Two-year engine guarantee up to €5,000. GAN backs the module with warranty coverage because they’re confident it won’t cause engine damage.
50-day test drive period. Try the module for almost two months. Don’t like it? Return for full refund.
Complete reversibility. Unplug the module and the car returns to stock behavior immediately. No trace in ECU memory, no software changes, nothing for dealers to detect.
If naturally aspirated engines can safely handle 12% more power, why don’t manufacturers tune them that way from the factory?
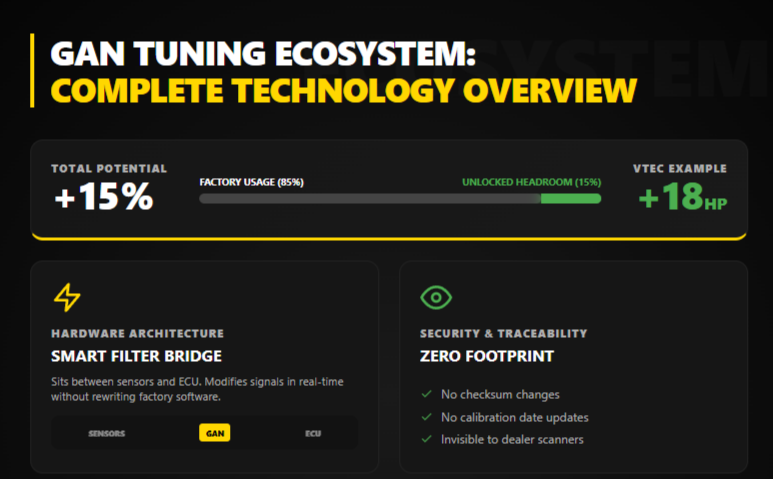
These factors mean manufacturers typically use 85-90% of an NA engine’s capability, leaving 10-15% headroom that chip tuning can unlock.
Don’t expect dramatic transformation. A naturally aspirated engine with chip tuning won’t suddenly feel like a turbocharged engine. The laws of physics prevent that.
What you will get: noticeably sharper throttle response, better mid-range pull, less power loss when running accessories like A/C, and slightly better fuel economy if you drive conservatively.
What you won’t get: the massive 30-40% power gains possible with turbocharged engines, or the ability to keep up with cars that have significantly more displacement or forced induction.
GAN’s testing on 30,000+ vehicles shows that naturally aspirated engine owners are generally satisfied with the improvements – as long as they have realistic expectations going in. The 10-12% gain is enough to make daily driving more enjoyable without fundamentally changing the character of the car.
Naturally aspirated engines gain less from chip tuning than turbocharged engines because physics limits how much air they can ingest. But 10-12% more power with improved throttle response and a flatter torque curve makes a noticeable difference in daily driving.
GAN GA+ optimizes what’s already there – throttle maps, fuel delivery, ignition timing, valve timing – to extract the performance headroom manufacturers deliberately left unused. The module is completely reversible, preserves your warranty (when removed before service), and comes with a 50-day trial period to verify the gains yourself.
If you’re driving a naturally aspirated engine and want modest but meaningful improvements, chip tuning delivers. Just don’t expect turbo-level gains from an atmospheric engine.
Turbo-diesel engines respond to chip tuning better than any other engine type. You can see gains up to 30% power and 35% torque – significantly more than naturally aspirated or even turbocharged gasoline engines.
Why? The way turbo-diesels work makes them particularly suited for tuning. Let me explain what’s actually happening.
Rudolf Diesel developed his compression-ignition engine in the 1890s, initially running it on vegetable oils and light petroleum products. Fun fact: he originally wanted to use coal dust as fuel. That didn’t work out.
The real breakthrough came in 1898 when Gustav Trinkler built the first high-pressure diesel engine at the Putilov factory in St. Petersburg. This established the fundamental design we still use today.
Turbochargers entered the picture in 1911 when Alfred Büchi patented the design. Initially used in WWI aircraft to maintain power at high altitude, turbochargers didn’t appear in passenger cars until much later. The first turbo-diesel passenger car was the Oldsmobile Cutlass in the US market.
Why does this history matter? Because turbo-diesel technology is mature and well-understood. Engineers have had over a century to refine how these engines work, which means manufacturers know exactly how much performance headroom exists in the hardware.
A turbocharger uses exhaust gases to compress intake air. More air in the cylinders = more fuel can burn = more power output.
The process:
Burning fuel creates high-pressure exhaust gases. These gases exit through the turbine side of the turbocharger, spinning the turbine wheel at up to 250,000 RPM. The turbine wheel is connected by a shaft to the compressor wheel. The compressor spins at the same speed, forcing intake air into the engine at higher pressure than atmospheric.
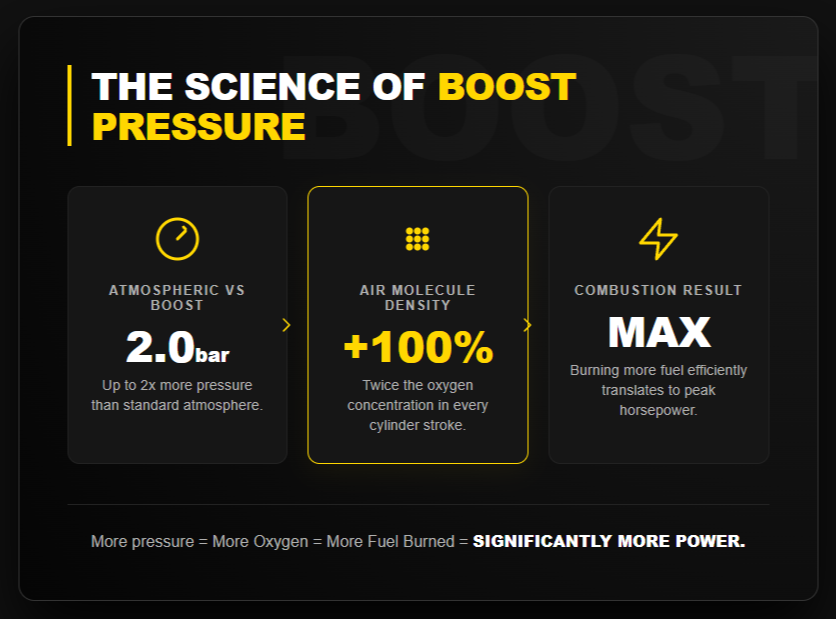
Result: your engine gets maybe 1.5-2.0 bar of air pressure instead of 1.0 bar atmospheric. That’s 50-100% more air molecules in each cylinder, which allows burning 50-100% more fuel, which produces significantly more power.
The problem is heat. Compressing air generates heat (basic thermodynamics), and hot air is less dense than cool air. That’s why most turbocharged engines include an intercooler – a radiator that cools the compressed air before it enters the engine. Cooler, denser air = more oxygen molecules = better combustion.
Diesel engines work fundamentally differently than gasoline engines, and these differences make them ideal for both turbocharging and chip tuning.
Diesel advantages for tuning:
Compression ignition means no spark plugs. Diesels ignite fuel purely through compression heat (around 550°C). This means you can run much higher boost pressures without worrying about detonation (knock) that limits gasoline engines.
Lean fuel mixture. Diesels always run with excess air – unlike gasoline engines that need precise air-fuel ratios. You can add more fuel without running rich, as long as you’re adding proportional boost pressure.
Massive low-end torque. Diesel combustion produces peak torque at much lower RPMs than gasoline. Turbocharged diesels often hit maximum torque by 1,500-2,000 RPM. This makes them incredibly responsive to tuning.
Built stronger from the factory. Diesel engines have higher compression ratios (typically 16:1 to 22:1 versus 9:1 to 11:1 for gasoline), so they’re built with stronger internals – forged crankshafts, reinforced pistons, heavier connecting rods. This means they can handle more power without mechanical failure.
| Engine Type | Typical Power Gain | Typical Torque Gain | Why |
| Turbo-diesel | Up to +30% | Up to +35% | High boost headroom, strong internals |
| Turbo gasoline | Up to +30% | Up to +30% | Boost limited by knock, requires timing retard |
| Naturally aspirated | Up to +12% | Up to +15% | No boost to increase, limited by displacemen |
These numbers come from GAN’s testing on over 30,000 vehicles since 2015 across 8 countries.
GAN GT targets the fuel rail pressure sensor in diesel engines. This sensor tells the ECU how much pressure exists in the fuel system (typically 1,600-2,000 bar in modern common-rail diesels).
The process:
The sensor reads actual fuel rail pressure at, say, 1,800 bar. GAN GT intercepts this signal and modifies it downward to 1,500 bar before sending it to the ECU. The ECU thinks pressure is low, so it commands the high-pressure fuel pump to increase pressure. Actual pressure climbs to 2,000 bar.
Higher fuel pressure means finer fuel atomization and the ability to inject more fuel per stroke. Combined with the turbocharger already providing excess air, this creates more power.
Critical safety point: Factory protection systems stay active. If exhaust gas temperature climbs too high, the factory ECU still limits fuel. If turbo boost exceeds safe levels, the factory wastegate still opens to bleed off pressure. GAN modules work within these safety parameters – they request more performance, but the factory ECU has veto power if conditions become unsafe.
Engineers with over 20 years of calibration experience designed the GAN GT specifically for turbo-diesel engines. The module knows the safe operating limits for fuel pressure, boost pressure, and exhaust gas temperature, and stays within them.
The gains from chip tuning turbo-diesels are substantial and immediately noticeable.
Typical results from GAN GT on common turbo-diesel engines:
These aren’t theoretical numbers – they’re measured on dynamometers with real vehicles.
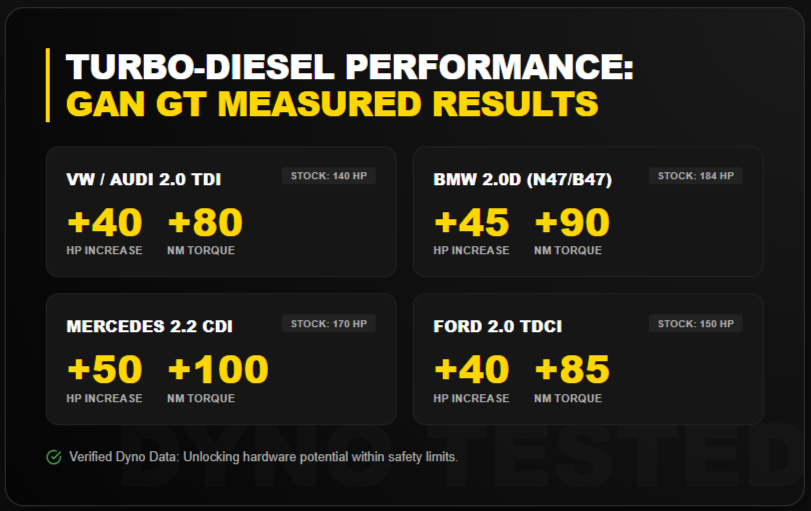
The torque increase is particularly noticeable in daily driving. Before tuning, you might need to downshift from sixth to fourth gear to pass someone on the highway. After tuning, you can pull away in sixth gear from 1,800 RPM. The extra torque just pulls you forward without dropping gears.
Turbo-diesels see fuel economy improvements more consistently than gasoline engines when chip tuned, for a specific reason: torque curve optimization.
Stock turbo-diesels often have a narrow torque peak – maximum torque available in a small RPM range, say 1,800-2,500 RPM. Outside this range, torque drops off. This means you’re constantly shifting to keep the engine in its power band.
After tuning, the torque curve flattens and widens. You might have near-maximum torque from 1,500 RPM all the way to 3,500 RPM. This means fewer gear changes, more time at optimal engine speeds, and better overall efficiency.
Real fuel economy data from GAN testing:
Highway driving (constant speed): 10-15% improvement
Mixed city/highway: 8-12% improvement
City driving (conservative): 5-8% improvement
Aggressive driving: 0-5% improvement
The improvement comes from staying in higher gears at lower RPMs while still having adequate power for acceleration. Less time at high RPM = less fuel consumption.
Commercial diesel operators (vans, trucks) running highway routes see the biggest benefits. Fleet testing shows some vehicles saving 10+ liters per 100 km over thousands of kilometers, which adds up significantly.
GAN GT connects either via the OBD-II port or directly to the fuel pressure sensor, depending on your specific vehicle. Installation takes 10-15 minutes with basic tools.
The module is completely reversible. Unplug it and the factory ECU returns to stock behavior immediately. No software changes, no permanent modifications, zero trace in ECU memory.
This reversibility is crucial for diesel owners who use their vehicles commercially or under warranty. Remove the module before service appointments, reinstall after. The dealer cannot detect anything in the ECU’s diagnostic logs.
Compare this to ECU remapping, which permanently modifies the factory software and leaves traces that dealers can easily identify during diagnostics.
If turbo-diesels can safely handle 30% more power, why don’t manufacturers tune them that way from the factory?
Model differentiation. The same 2.0 TDI engine appears in VW, Audi, Skoda, and SEAT models with power outputs ranging from 115 HP to 190 HP. It’s the exact same physical engine – just different ECU programming. Manufacturers use software to create entire model lineups.
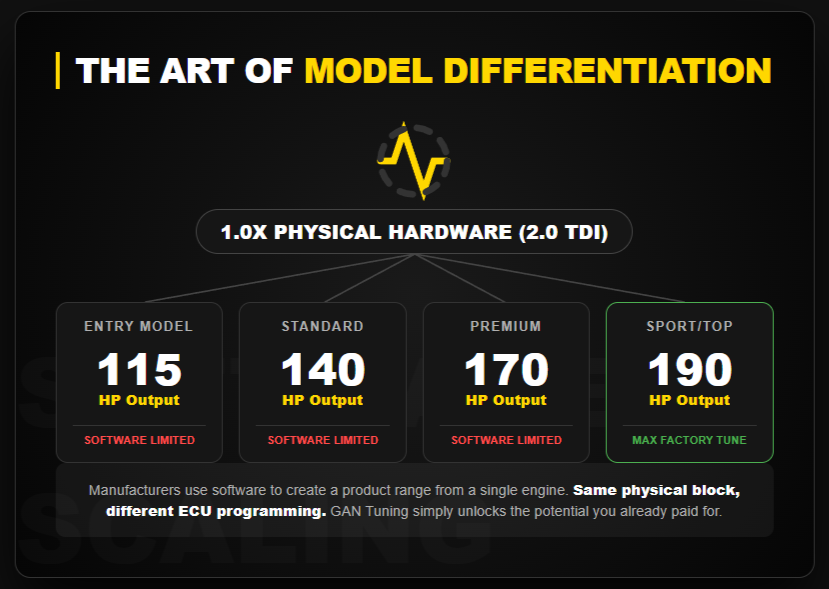
Global market requirements. One engine has to work in countries with terrible diesel quality and also in markets with ultra-low sulfur diesel. Conservative tuning ensures reliability everywhere.
Emissions regulations. Higher power often means slightly higher NOx emissions. Manufacturers tune conservatively to meet emissions standards with margin for variability.
Warranty costs. Program the engine to maximum power and you’ll see more warranty claims from drivers who abuse it. Conservative tuning reduces warranty expenses.
All these factors mean manufacturers typically use 70-75% of the hardware’s capability. The remaining 25-30% is performance headroom that chip tuning unlocks.
Turbo-diesel engines are the best candidates for chip tuning because:
GAN GT tested on 30,000+ vehicles shows consistent, reliable performance gains without compromising engine longevity. The €5,000 engine guarantee backs this up – they wouldn’t offer it if turbo-diesels couldn’t safely handle the power increase.
If you’re driving a turbo-diesel and want more performance, chip tuning delivers better results than any other modification you could make.
Next Page »« Previous Page

Contact us via WhatsApp